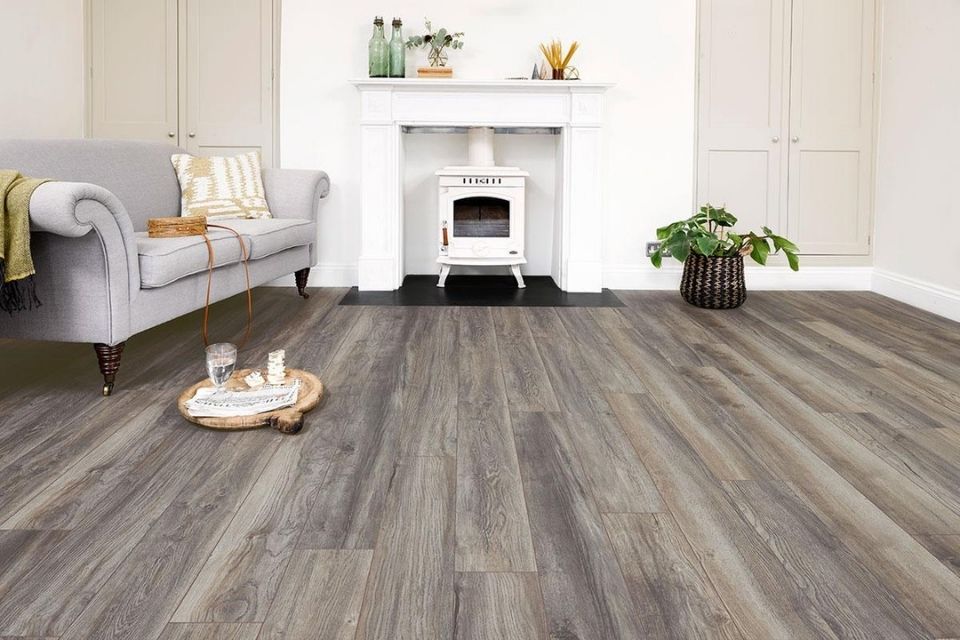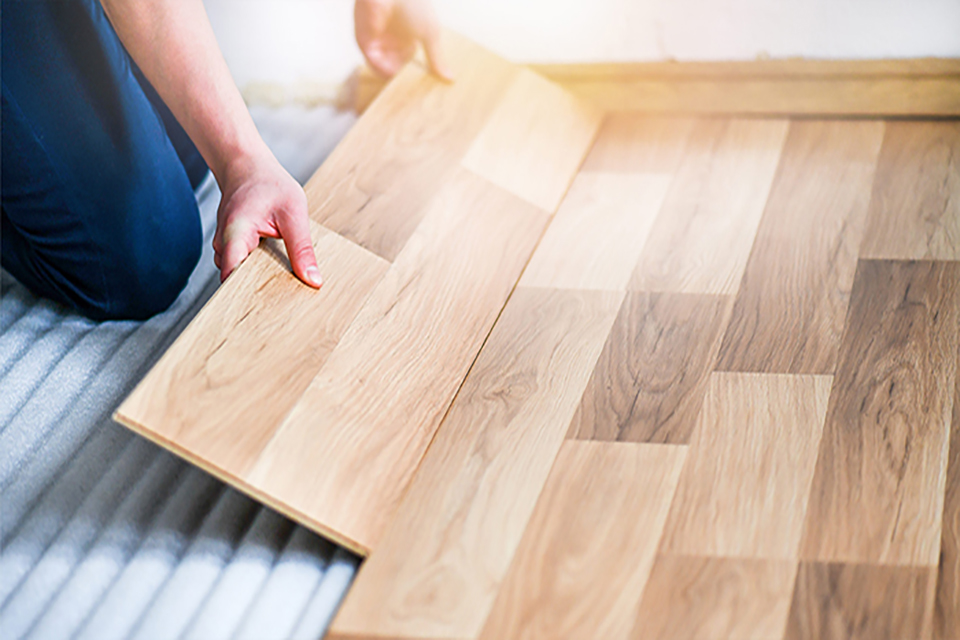
Why Should I Install Laminate Flooring?
Are you looking for information on how to lay laminate flooring in your home?
We have created this guide to provide you with everything you need to know about laying laminate flooring, including the steps that need to be taken and a full list of the tools and materials needed to complete the job.
There are many reasons why you may want to install laminate flooring. If your current flooring is looking a bit worn and tired, then it may be a good idea to think about switching to laminate flooring.
Below is a list of the benefits of choosing laminate flooring for your home:
- It's easy to install.
- It is scratch and water-resistant.
- It's easy to clean and maintain.
- There are many different colour and style options.
How to Lay Laminate Flooring Yourself
Below is a step-by-step guide on how to fit laminate flooring. Be aware that each brand of laminate flooring is different, so you will need to check the manufacturer's instructions to ensure you install it correctly.
Step 1
Begin by planning out your layout. Laminate flooring can be laid either vertically or horizontally, so lay some out to see which you would prefer.
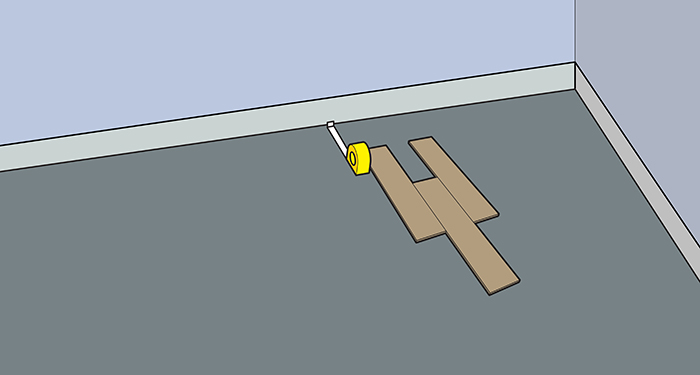
Plan your layout to ensure that the final row of boards will be at least 60mm wide. Adjust the width of your first row if needed. Remember to factor in a 12mm expansion gap at each end of the room.
Step 2
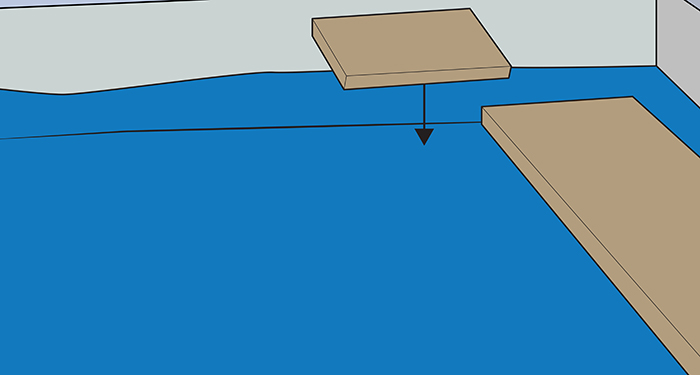
If you'll be fitting the laminate around a door frame, start by removing the door and then line up an offcut of underlay and a floorboard with the architrave.
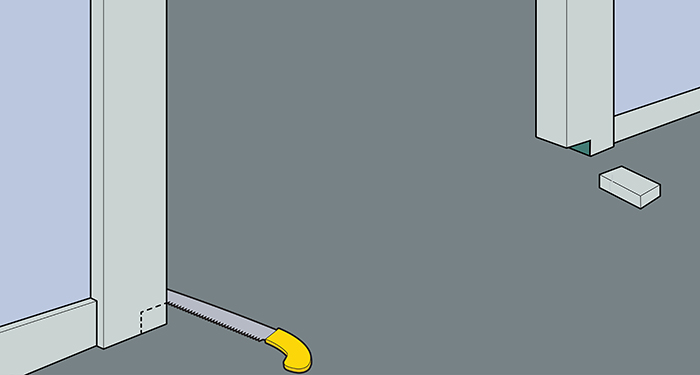
Use a panel saw to trim the architrave at that height. Then remove enough of the underneath of the architrave so that the laminate will fit underneath it.
Step 3
Most manufacturers recommend laying a foam or fibreboard underlay before installing your laminate flooring. This should be laid perpendicular to the laminate.
Step 4
Once the underlay is in place, start at the left-hand side of the wall where the door is and lay the first piece of laminate flooring with its tongue edge against the wall.
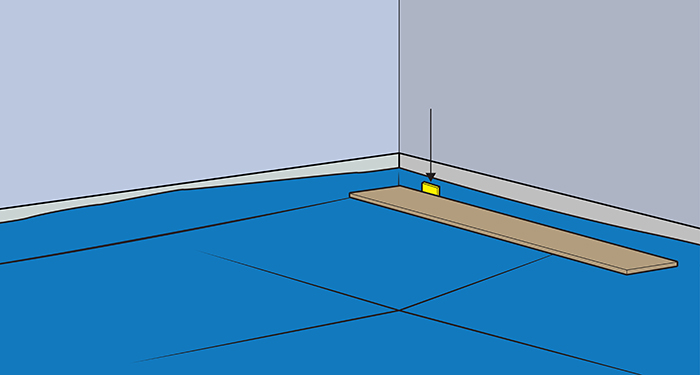
Move the board slightly so that you can insert spacers between the board and both walls.
Step 5
Line the next board up at the end of the first and push it down until it clicks into position. Be sure to maintain the expansion gap along the wall using spacers.
Step 6
Continue this step along the wall until you can't lay any more full boards, ensuring that the line of boards is perfectly straight.
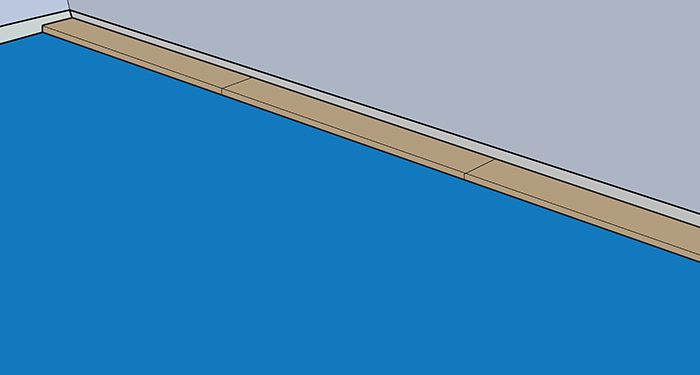
Step 7
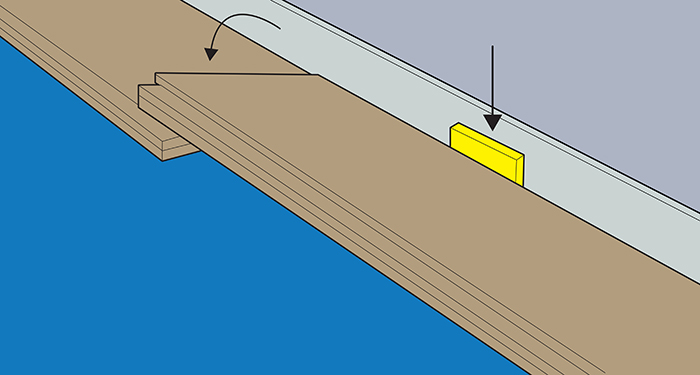
To fill in the gap at the end, lay a full board down parallel with the existing laid boards. Flip the board end over end, so it's upside down with the groove edge still facing you and the other end now touching the wall spacer.
Mark a straight cutting guideline parallel with the end of the piece it is touching. Carefully secure the board into your workbench and make the necessary cut. This can now be laid in the same way as the previous pieces to fill the gap at the end.
Step 8
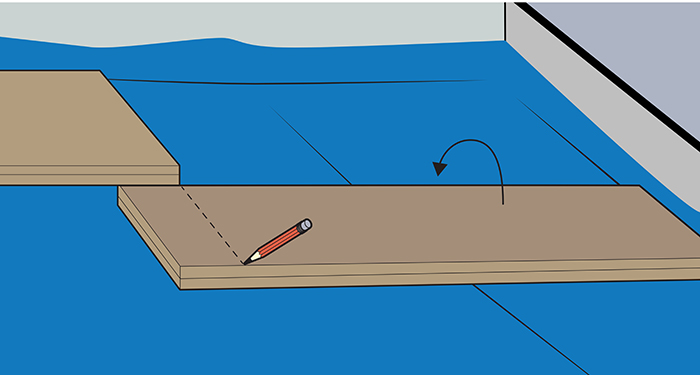
If the offcut is at least 300mm long, use it to start the next row at the same end where you started the first row.
Lay the laminate boards out and click them into place with the row it's next to, being sure to continue to leave spacers at the wall. Make sure the joint between boards on different rows is always offset by at least 300mm.
Step 9
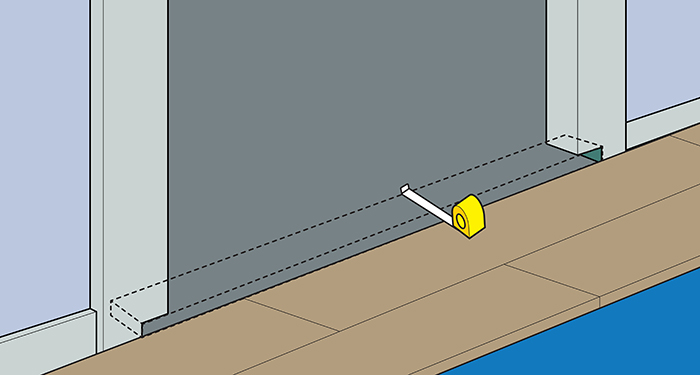
Once the second row is in place, it's time to fill in the gap between the first row and the door. Start by measuring the distance between the outer edge of the architrave on either side of the door.
Then, measure the gap between the first row and the door. Mark these measurements onto a board and cut it accordingly. Remember to allow for a 12mm expansion gap at the end.
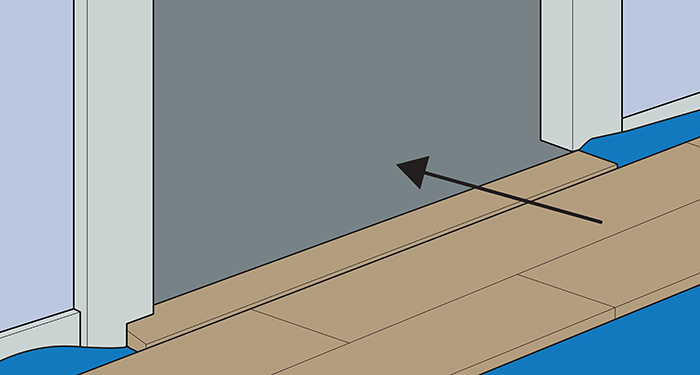
Next, lay the cut board up against the architrave and mark where you need to cut the ends, so it slots in place. Cut at the marks and then slide the first two rows away from the doorway so you can install the door piece or pieces.
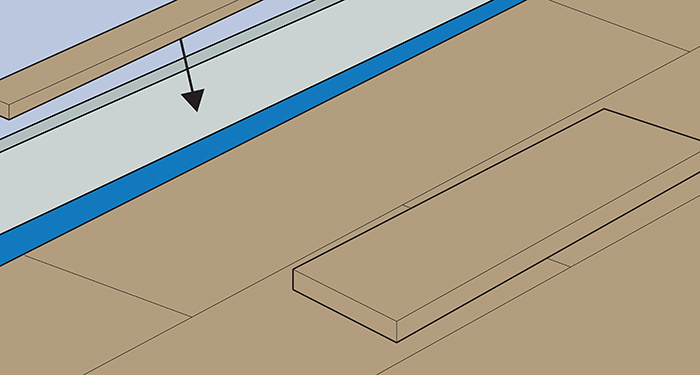
Step 10
You can then fix this piece to the first row and click it into place. Once you've done this, continue to lay the rows of laminate flooring, always remembering to leave a spacer gap at the walls.
Step 11
Once you get to the last row, you may need to cut the boards, so they fit in place. Measure and mark the boards appropriately, remembering to leave a 12mm gap for expansion. Cut according to the measurements and then fit this last row into place.
As mentioned earlier, different types of laminate flooring may have different installation guidelines or may lock together in a different way. Always be sure to check your manufacturer's instructions before going ahead with the job.
Tools to Lay Laminate Flooring
Below is a list of tools you'll need to lay laminate flooring:
- Tape measure
- Pencil
- Fine-toothed panel saw
- Jig saw
- Flooring spacers
- Clamps
- Workbench
- Combination square
- Chisel
- Hammer
- Metal ruler or straight edge
- Retractable knife
- Drill
- 32mm flat wood drill bit
- Mitre box
- Plane
Safety Equipment to Lay Laminate Flooring
You will need to following safety equipment for a laminate flooring installation:
- Safety goggles
- Dust mask
- Knee pads
Materials to Lay Laminate Flooring
These are the materials you'll need to install laminate flooring:
- Laminate floor
- Underlay or membrane
- Flooring trim
- Grab adhesive
- Panel pins
- Pipe surrounds
- Threshold bar
- Felt furniture pads
How to Prepare for Laying a Laminate Floor
To prepare for installing laminate flooring, you will need to begin by emptying the room of all furniture and obstacles. Remove the existing flooring and vacuum the area to ensure it's clean before the installation.
You should also check for any protruding nails or uneven surfaces on the floor, as these will need to be rectified before the installation.
Also, check the flooring for any damp before you start the work. You will also need to stack the unopened packets of laminate in the room where they're going to be laid for at least 48 hours.
Types of Laminate Flooring
There are two main types of laminate flooring. Below is some information on each type:
Plastic Laminate
Laminate flooring is fully man-made and involves printing a picture onto the surface, usually designed to look like real wood.
There is then a protective layer applied on top to protect the printing. Laminate flooring can look a lot like real wood, but most people can identify a faux wood flooring upon close inspection.
Engineered Wood Laminate
Engineered wood laminate tends to come at a much higher price than plastic laminate. However, with proper care, it can last much longer.
This is a much more convincing replica of real wood. It involved bonding a true layer of hardwood over a substrate of plywood. This gives it the appearance of solid wood flooring without the high price point.
FAQs
Q: How do you clean laminate flooring?
A: You can clean most laminate flooring types with a mixture of water and vinegar. Use a slightly damp mop and try not to make the floor too wet.
For any small spills, simply use a damp cloth and wipe up the residue immediately. Keep the floors free from dust and dirt by sweeping regularly.
Q: How do you lay laminate flooring around a pipe?
A: Follow the steps below to lay laminate flooring around a pipe:
- Measure and cut the board as normal as if the pipe wasn't there.
- Lay the board to the side of the pipe and use a tri-square to draw a line on the board to show the location of the pipe's centre.
- Then, move the board, so it's at the front of the pipe and draw a line where the centre of the pipe is. Where the two lines intersect is where the pipe will be positioned.
- Secure the board with clamps and use a drill with a 2mm flat wood drill bit to drill a hole where the two lines intersect.
- Using a straight edge, draw a pair of lines from the edges of the hole to the edge of the board, each at a slight outward angle.
- Cut along these lines with a jig saw, or panel saw.
- Fit the board into position and then apply adhesive to the offcut and slide it into position.
- Hide the expansion gap with a radiator pipe surround. Simply apply adhesive to lock this in place.
Q: How do you fit a threshold bar?
A: Be sure to choose a threshold bar that is suitable for your flooring. Measure the width of the doorframe and allow an expansion gap on both sides.
Then, cut the threshold bar to size. Then, secure the threshold bar as per the manufacturer's instructions.
Q: How do you fit flooring trim?
A: Remove the spacers and cut down any membrane as needed. Then, measure to see what size of flooring trims you will need.
Use a mitre box and saw to make 45-degree angle cuts at the ends of the trim that will fit into the corner joints.
Use grab adhesive to fix the flooring trim to the skirting. Don't fix the trim to the laminate floor, as this will prevent expansion.
Q: What is the best laminate floor type?
A: This will depend on your personal preference. Laminate floors come in several different styles, and every person has their own taste.
It's best to shop around a little bit before committing to a laminate floor so you can be sure you find one that you love.
Sources
- https://www.youtube.com/watch?v=vj2RwFYQ1gc
- https://www.directwoodflooring.co.uk/dwfblog/benefits-of-laminate-flooring
- https://parryscarpets.com.au/laminate/the-complete-buyers-guide-to-choosing-laminate-flooring