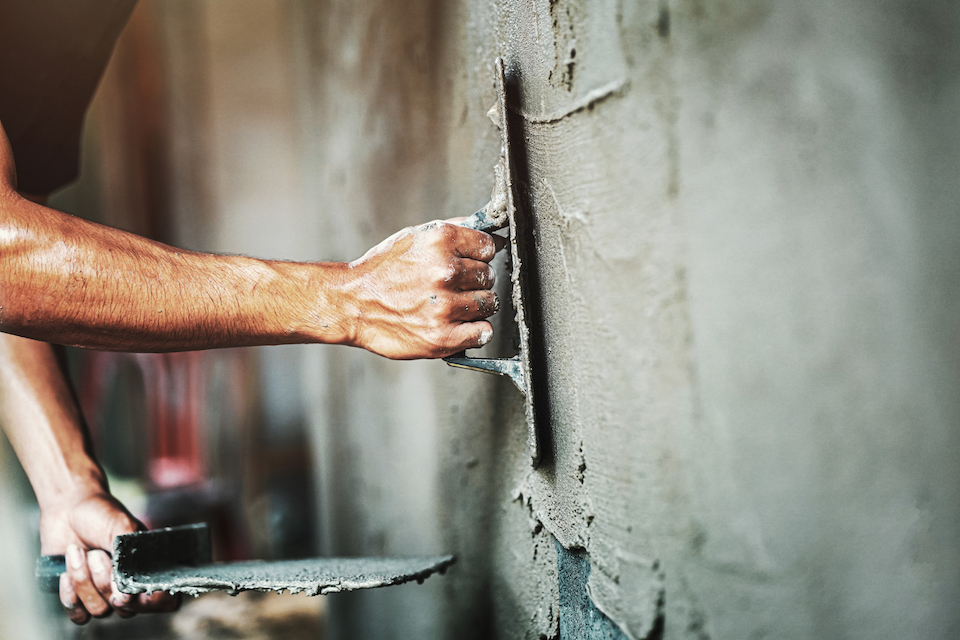
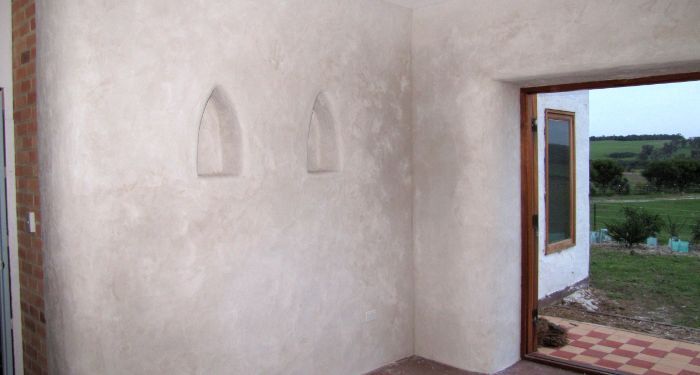
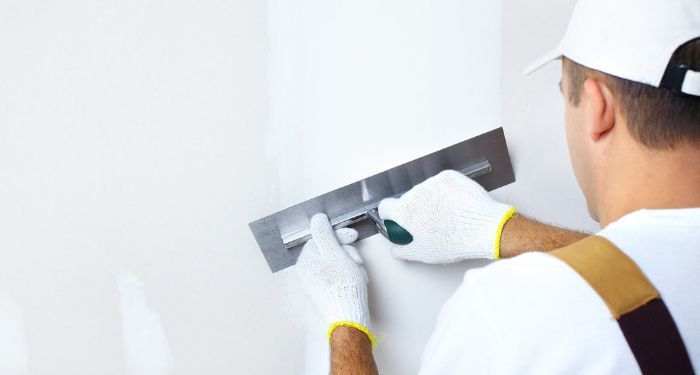
Painting New Plaster
Whether you’re decorating your own home or brushing up on your home improvement skills for your career, painting over a newly plastered wall correctly is essential for maximum results.
It isn’t a case of throwing on a layer of paint and bob’s your uncle; there are important steps to take in both prep, and execution.
Failure to do so can cause a number of issues further down the line, from peeling, cracking paint to a wall that dries streaky, either way, the results will not come out as the professional vision you imagined.
While some of these issues may not be apparent straight after painting new plaster, they can present themselves in the near future - which can result in further maintenance to correct them.
The goal is to achieve the perfect paint-job on the first attempt to avoid extra costs. Follow these simple steps to correctly paint your new plaster:
How Long Before You Can Paint New Plaster?
After plastering a wall, it takes around two hours to set, but this doesn’t mean you can paint it straight away. You have to wait until the plaster is fully dry before you can apply any paint.
Plaster usually takes around 4-6 days to fully dry; however, the recommended time to wait before applying paint is at least one week.
The best method to use when figuring out whether your plaster is fully dry or not is to forget timeframes and analyse the colour. Quite often, plaster can take up to a month to fully dry, so to be on the safe side ensure you check the colour of the plaster before decorating.
When plaster dries, it becomes a light shade, and the surface is completely even. If you still see dark patches on your wall, it is not worth the risk, and you should give it some extra time before painting.
Wet plaster is much less absorbent than dry plaster, therefore painting over a wall with dark patches will result in some areas looking patchy and translucent.
The patches of damp plaster could also interfere with the bonds of the paint, causing these areas to become flaky and dry - which is very hard to fix once this mistake has been made.
There are a number of factors that affect the drying time of plaster, including the weather and time of year, whether you have central heating or not, and how maybe layers of plaster were applied.
In order to reach peak drying time, increase the ventilation in the room by opening windows and doors. Opening multiple windows and doors in the home allows a steady flow of air to flow through the rooms and help the plaster to dry more effectively.
Natural drying is best. Try not to switch on your central heating for at least 48 hours after plastering your home. If on a hot day the sun is shining directly onto the plaster, try and keep the curtains closed - if the plaster dries too fast this can cause cracking.
Paint for New Plaster
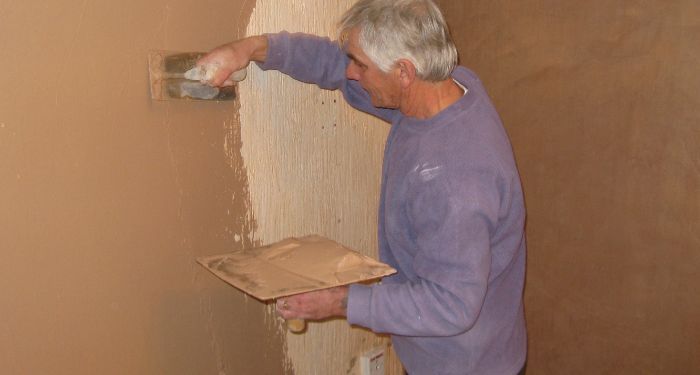
A mist coat is an essential step to prime the wall before you decorate. You can create this yourself with a water-based paint matt emulsion paint, diluted with water. Ensure the paint you use is both matt and water-based.
Using a vinyl or glossy paint as a mist coat will not bond with the plaster, resulting in peeling and cracking further down the line. Using a paint that is oil-based rather than water-based doesn’t allow the plaster underneath to breathe, as it traps in moisture. This can result in unsightly and hard to fix damp patches in the future.
If you don’t want to go down the ‘DIY’ route with the mist coat layer, you can purchase a wall primer in most hardware stores. These paints are designed to be applied directly onto a freshly plastered wall (once dry of course), with the intention of creating a flawless base for your topcoat.
If you are having issues with your plaster, some paints have been formulated especially for porous and damaged surfaces.
If your fresh layer of plaster is starting to flake a little and is feeling chalky, this primer is the perfect one for you. This may save you from having to replaster the entire wall, reducing both time and money spent.
If you are in a huge rush to get your walls decorated and don’t have time to wait weeks, there are specialised paints for new plaster you can purchase to get the job done then and there.
Obviously, these are the last resort option, as they are not as reliable as the mist coat method; however, if your housewarming party is rapidly approaching and you’re in a panic - don’t fret.
These paints are known as ‘Microporous paints’, which are designed to be breathable. New plaster needs air to be able to fully dry - if normal paint were to be applied to damp plaster it would cause issues such as damp and mould in the future.
Microporous paint allows the plaster to continue drying after application, due to the mixtures of polymers in the solution. This makes it possible for the plaster to breathe even after painted, and dry without issues.
Microporous, breathable paints are usually quite a bit pricier than your average emulsion; however, as you will be skipping the mist coat step with this method, you won’t be dealing with the mess of thin paint mixtures.
These paints are usually designed for external usage, so for those days where you’re sprucing up the outside of your home. Paints like Dulux’s range of microporous Weathershield paints, are created to withstand the outdoor elements, making them tougher than most paints, however you can make an exception and use them indoors.
One of the biggest downfalls of using this type of paint is the lack of colour range. Due to them being for outdoor use, they often come in a limited selection of shade ranges.
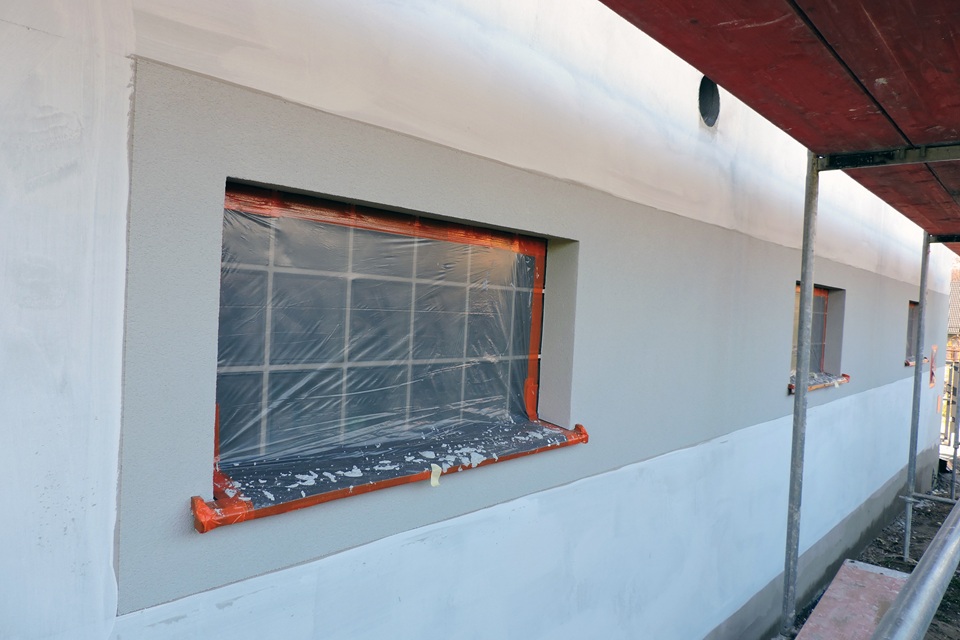
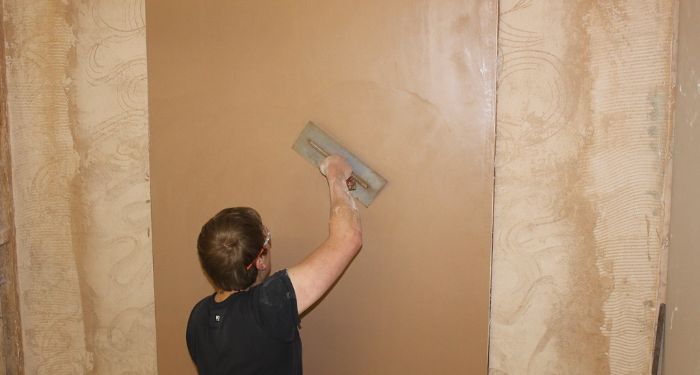
How to Seal New Plaster
Sealing new plaster is a simple step, but a critical one when aiming to ensure your paintwork is high quality. To seal your plaster, you will need a base primer paint, commonly known as a mist coat. The purpose of the mist coat is to add moisture to the dry plaster wall, to make it less absorbent when you apply your topcoat of paint.
A newly plastered wall is extremely absorbent and will suck in any liquids applied to it, so any normal paint applied directly to it will be absorbed, creating an uneven finish. The mist coat is diluted with water, which is absorbed by the plaster. The plaster can only absorb so much water, so after this coat is applied, it is safe to apply regular paint.
When normal paint is applied directly to fresh plaster, it cannot adhere sufficiently. However, when water is added to the paint, it creates a mixture that is capable of bonding with the plaster, which prevents any peeling, cracking, or flaking - resulting in fewer touch-ups.
To create your own mist coat, you will need just two things:
- Water-based matt emulsion paint
- Water
As previously discussed, you can purchase a pre-made primer paint if you don’t wish to make your own.
When applying the mist coat, make sure you work quite quickly. Since this is essentially diluted paint, it will be a lot runnier and messier to work with, which can result in the paint dripping down the wall.
Due to the plaster absorbing the water from the paint mixture, the mist coat will dry very quickly compared to normal paint. This means you have to paint areas quickly and check them before they dry to avoid uneven texture.
Once you have your mist coat prepared, use a large paintbrush to paint a thin layer in upwards motions. Painting with a larger brush will avoid streaks and will allow you to paint a larger surface area. Painting in an upward motion prevents the paint from dripping down the wall, creating a more even surface.
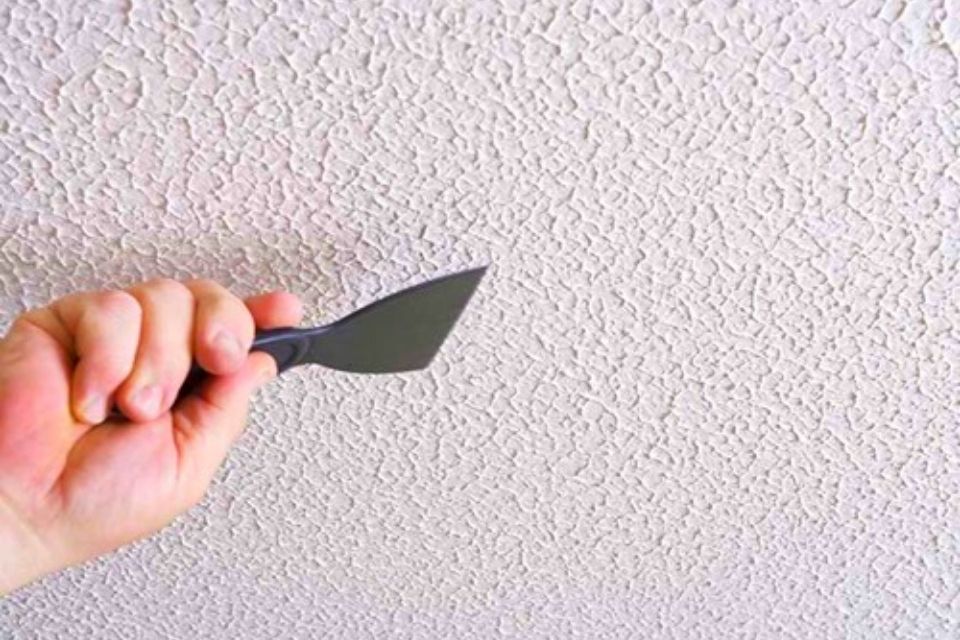
Once you have painted your first layer, and it has dried, check for any irregular patches on your wall. The mist coat will make these uneven patches of plaster extremely visible. If you spot any small bumps or uneven areas of plaster, lightly sand them down with fine sandpaper.
Do not apply too much pressure, as you can damage the plasterwork. Following this, you can apply a second layer. Try to wait 24 hours for the mist coat to dry before applying your topcoat.
How Many Mist Coats on New Plaster?
A mist coat is a necessary step when choosing to paint new plaster. This step ensures that the paint bonds to the plaster, which prevents peeling and cracking and provides an excellent primer to give the topcoat an even coverage.
Mist coats for new plaster are essentially watered-down paint, which absorbs into the plaster to eradicate the walls absorbent quality. If this step is not taken, the topcoat will be absorbed instead, resulting in them becoming translucent and uneven.
The amount of mist coats for new plaster depends on the quality of work done by the plasterer, and on any factors that may have sacrificed the quality of the plaster when drying.
After applying the first coat, you should be able to see the quality of the plaster. If you had to sand down some issues after the initial coat, you will need to apply a second layer of mist coat, as the sandpaper will have rubbed off areas of the initial layer. If you don’t apply a second layer, you run the risk of your wall looking patchy and uneven when the topcoat is applied.
If you found no issues with the plasterwork after the first coat, quite often one mist coat is enough. However, if you want to create the highest quality finish, add a second coat just to be sure. This will provide longer durability, and the paint may require less maintenance in the future. Most professionals will apply two mist coats, followed by two topcoats to ensure that the paint is flawless and lasts a long period of time.
Applying multiple paint coats can be time-consuming. However, in the long run the savings on costs of maintenance make it well worth the extra hours.
What’s the Mist Coat Ratio?
When creating your mist coat, you want to make sure that you use the right ratio of paint to water. When mixing the emulsion, you need to ensure that the mixture is not too thick. If the mixture is too thick, it will not serve its purpose to absorb into the plaster. If it's too thin, it may just leave you with a damp wall.
There are many sources online stating different ratios when creating an emulsion for your base layer - which can be extremely confusing. However, the average and most commonly used ratio for mist coats is a 70:30 ratio of paint to water. This is a rule of thumb; each paint is different so you may need to add more or less water, depending on the thickness of the paint for your new plaster.
Paints with a higher viscosity will require more water in the mixture than thinner paints. As long as the amount of water you have added to the mixture is between 20% to 40%, you should be fine - just make sure to monitor the consistency.
The best option, to avoid wasting any paint, would be to gradually add water until the mixture is of running consistency. Once you have applied this mixture to the wall, there is, unfortunately, no turning back.
Testing the mist coat on a small section of the wall first may be the best option to avoid any irreversible mistakes. When creating the mixture, you’re looking to produce an emulsion that is mostly opaque when applied to the new plaster.
The colour of the paint doesn't matter, because the goal during this step is to be able to see the plaster through the layer of paint. Although, most professionals stick with a simple white base coat, to maximise the end result and avoid any issues.
If you cannot see the plaster through the mist coat, the step has not been done correctly. If the mist coat is mixed and applied incorrectly, the paint will have to be removed in order to start the process again or peeling and cracking will occur in the future. Trust us; this is something you’re not going to want to put yourself through, so make sure you test the consistency of the paint before applying it to the entire wall.
Applying a mist coat seals your new plaster effectively and creating your own lowers costs. There is a lot of misleading information on the web, which includes using PVA glue to seal new plaster. However, we recommend you steer clear of this advice, as it can ruin the durability of the paint resulting in a lot of upkeep and maintenance.
PVA is not created to penetrate into plaster, which is what is needed to keep the bonds between the paint and the plaster adhered. Using PVA creates no bonding, causing the paint to ultimately flake away over time.
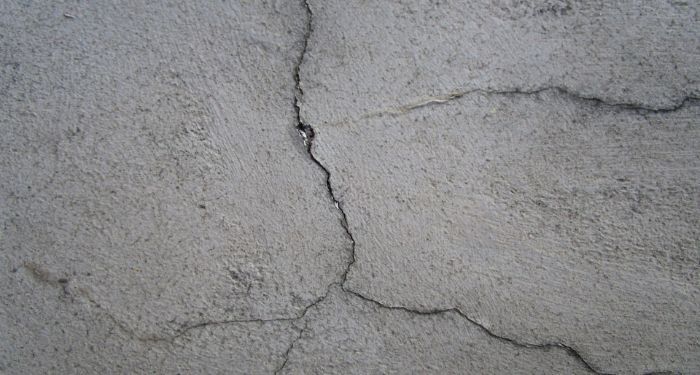
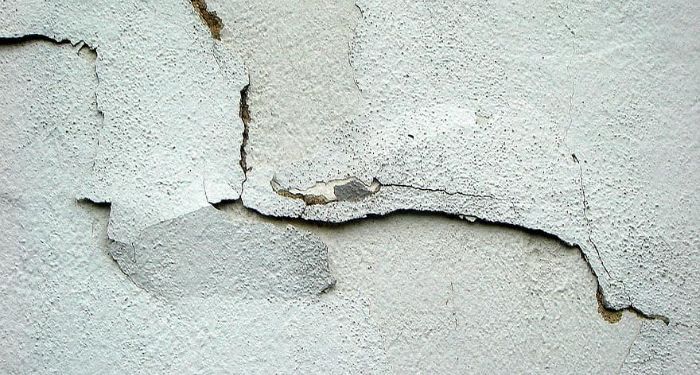
New Plaster Cracking
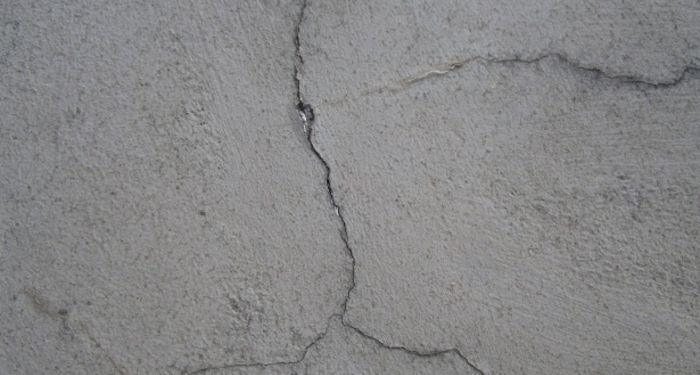
Hairline Crack in New Plaster
Occasionally, plaster can crack in the drying process. It’s quite common to notice a hairline fracture or two in new plaster, which isn’t what we want - but it’s not the end of the world. There are a few methods to correct this issue as and when it happens, don’t panic!
Hairline cracks in plaster can happen from time to time. The most common cause of this is the plaster drying too quickly. As we mentioned earlier, there are factors which contribute to the drying time of your new plaster, and these factors can also contribute to the quality. If your plaster has dried and thin vertical and horizontal cracks have appeared, this is usually due to shrinkage.
Shrinkage can happen when the elements were not right in the environment where the plaster was drying. If the surrounding area is too warm, for example, if you have your central heating on in the days after the wall has been freshly plastered, you may be in for a surprise - and not a good one.
Cracks can also appear if the hot sun is beating down through your windows onto the fresh plaster. Think of the Nevada desert in the movies, covered with cracks as the sun has dried up every last bit of moisture - it’s the same with your walls. Sunshine on a scorching hot day can result in some damage, which we want to avoid.
Ensure that the atmosphere surrounding your new plaster is at the most optimal level for drying. Keep your home cool, open the windows to allow a steady flow of air through the rooms. This will dry the plaster naturally. If it’s a hot day and the sun is shining onto the plaster, close over the curtains to avoid it drying too fast.
Hairline cracks are not the be-all and end-all; they can be fixed. These types of cracks can be filled with caulking. Caulking or caulk is used as a sealant to fill cracks or gaps around the home. It can be used to fill gaps around windows doors, plumbing and pipes to keep the draft out, and those nasty bugs from invading your home. Using caulking is a quick and easy fix to get your wall back into tip-top shape.
Large Cracks
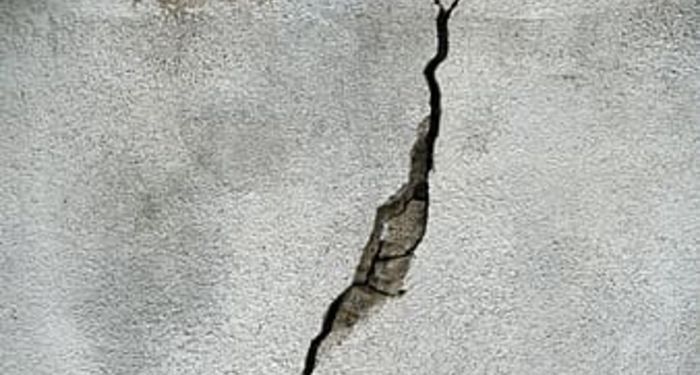
Larger cracks in new plaster are where issues could start to arise.
Although cracks are generally harmless, they could also indicate structural damage to the building and the need for some professional help. Cracks that are jagged in appearance or resemble stairs could be caused by structural movement, which could result in damage to your home.
How do you know if a crack could be harmful? It’s all about the measurements. The rule of thumb is that the larger the crack, the more serious it is. Hairline cracks are considered harmless in the building industry, however, if you’ve whipped out the tape measure and are seeing a crack ¼ wide or more, it may be time to call in the big guns.
The positioning of the crack is also a tell-tale sign of how serious it could be. The majority of small cracks emanating from your windows and doors are considered harmless. However, if you’re finding your plaster is cracking where the wall and ceiling joints connect, this could potentially cause the ceiling to detach from the wall if not dealt with quickly and professionally.
Do not attempt to repair large cracks without speaking with a professional, as this could result in some seriously costly problems in the future.
What’s One Coat Plaster?
Plastering is a complex and time-consuming job. It more often than not needs two coats, plus a base layer of PVA in order to do the job correctly.
One Coat plaster is designed to make your job much easier - and the clue is in the name.
Generally speaking, you will only have to apply one coat of this type of plaster due to its thickness, compared to the many layers you need to build up regular plastering. One coat plaster acts as a base and top coat in one, instead of separate layers.
One coat plaster is a much quicker method, however, it’s not the perfect option for all occasions. This type of plaster is best used when repairing previous plastering jobs, and for use in small areas. It’s not the smoothest of plasters, so plastering a whole room solely with one coat plaster would not result in a flawless finish - stick to the stereotypical plastering methods for jobs like these.
One coat plaster has two main advantages over your usual plaster: cost and time. As you are only mixing up one patch and coating the wall with one layer, both the cost of resources and the time taken to complete the job is reduced a considerable amount.
However, on the other hand, it’s not the most reliable mixture. We recommend you only use this for small DIY fixes, and not for large plastering jobs as the end result will not be as even and smooth as normal plaster.
How to Repair Blown Plaster
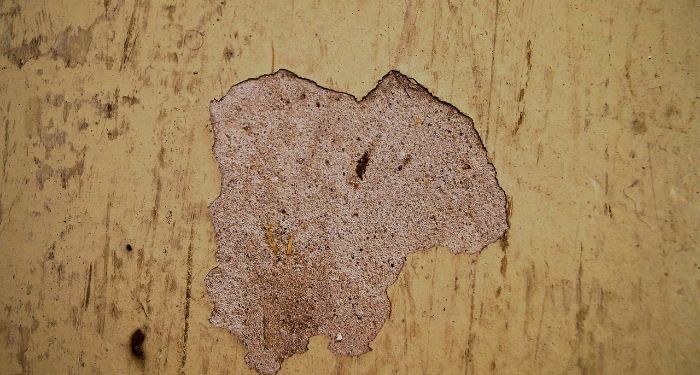
Blown plaster refers to plaster losing its adhesion to the surface it was applied to. It’s the same sort of thing that happens to paint when you do not use a mist coat - the plaster begins to peel off the wall.
You can tell when your new plaster has blown because sections of the plaster will be coming away from the surface behind it. Often chunks of plaster can completely fall off, leaving visible holes on the wall.
Repairing Blown Plaster
Repairing blown plaster is a little bit trickier than just filling in a crack. Here are the steps to follow:
- Clean the hole thoroughly: Ensure you remove any loose plaster, and then brush away all dust in, and surrounding damaged part of the wall. This step is extremely important to ensure the new plaster adheres to the surface.
- Add fibreglass mesh: Measure the hole and cut down the mesh until it covers the hole sufficiently. Be sure that the mesh is slightly larger than the hole, around 20-30mm around the circumference. Place the mesh over the hole.
- Cover the hole with filler: Push the filler through the mesh using a trowel, it is important you gently push a sufficient amount into the hole to ensure it is completely filled. Be careful, as you don’t want to damage any more of the surrounding wall.
- Remove excess filler: Remove any excess filler with a straight edge to ensure it is even and smooth. Wait around an hour for the filler to fully dry.
- Sand down the repaired area: Use fine sandpaper to lightly rub over the area to make it smooth.
- Add a second layer of filler: Apply a second layer of filler, and remove excess
- Sand for a final time: Sand over the area gently, until smooth. Leave the filler to dry for around 24 hours, and voila!
Preventing Blown Plaster
When plaster is applied, it needs to bond and stick to the surface behind it; otherwise, it will not stay in place. Usually, plasterers apply a layer of PVA to the surface first, before adding the initial layer of plaster. If this step is not taken, it can cause the plaster to come away.
Before applying the adhesive layer, the surface must be clean and free of dust. If the area is contaminated with dirt, the sealer will not adhere to the wall correctly, causing the sealer and plaster to blow in the future.
Blown plaster can also happen when the surface the plaster has been applied to is extremely porous. This is due to the surface sucking the water out of the new plaster before it has time to adhere; therefore, the plaster dries but does not stick.
There are two types of surface to consider when deciding which plastering methods to use:
- High Suction Walls: A high suction wall is very porous, meaning that any liquid applied to it will be absorbed extremely quickly. High suction walls can result in new plaster drying too rapidly, which can result in issues such as hairline cracks, large cracks and even blown plaster.
- Low Suction Walls: A low suction wall is a surface that struggles to soak up any water. Plaster needs to bond to the surface it is applied to in order for it to adhere. If not dealt with correctly, low suction walls can cause cracking, crumbling and blown plaster.
Patch test the wall first, before carrying out the job. Trialling some plaster on a small area of the wall first will tell you a lot about the porosity of the surface. If the plaster feels dry after a short amount of time, you have a high suction wall. If the plaster is still considerably wet to the touch, you have a low suction wall.
If you have a low suction wall, one coat of PVA before plastering will be sufficient. If you have a high suction wall, you will need to apply multiple coats of PVA to ensure that the bonds are correctly made.
If you do not add enough layers of PVA to a high suction wall, the surface will begin to absorb the water out of the plaster when it is applied, which will result in it drying out too quickly. When plaster dries out too quickly, it has a tendency to crack, and blow.
Plasterer Costs
When hiring a plasterer, costs vary depending on both how long the job will take, and how many walls need plastering. Usually, when speaking to a plasterer, they will analyse the site, work out the costs and quote you for the job.
Most plasterers use square metres as an indication of how much a job will cost. The more square metres that need plastering, the more time and materials the job will take. The plasterer has to take into account the costs of materials as well as the physical work.
When hiring a plasterer, there are two types of jobs: Re-Plastering and New Plastering. Plastering can be done to both walls and ceilings. Here are some average prices based on the type of plasterwork, size of the room, and how long the job will take to complete (keep in mind that these prices are the average, so you may be quoted higher or lower):
| Size of Room | Average Price | Length of Time |
|---|---|---|
| Re-Plaster Small Sized Room | £450 | 1 Day |
| Re-Plaster Medium Sized Room | £495 | 1-2 Days |
| Re-Plaster Large Sized Room | £625 | 2-3 Days |
| Plaster Small Sized Room | £650 | 2-3 Days |
| Plaster Medium Sized Room | £765 | 2-3 Days |
| Plaster Large Sized Room | £1,185 | 3-4 Days |
| Plaster Small Ceiling | £275 | 6-10 Hours |
| Plaster Medium Ceiling | £360 | 8-12 Hours |
| Plaster Large Ceiling | £575 | 2-3 Days |
FAQs
Q: How many coats of paint are needed on new plaster?
A: The number of coats of paint on new plaster should be at minimum 2. However, the number of coats your wall will need depends on
the quality of the plasterwork, and how professional you would like the finish to look. Before applying a topcoat of paint,
new plasterwork needs at least one layer of mist coat.
This is an emulsion created with a ratio of 70:30 paint to water.
You must apply a thin layer of this emulsion to your new plaster once it is fully dry, and then analyse the wall for imperfections.
If you find any uneven spots once the first layer is dry, sand them down lightly with fine sandpaper, and add a second coat.
Leave your mist coat to dry for 24 hours before applying at least one coat of topcoat.
Q: How long does new plaster take to dry?
A: The estimated drying time for new plaster is 4-6 days; however, it can take up to a month, depending on the conditions. Drying time varies greatly depending on the time of year, weather, and conditions in your home. We recommend waiting at least one week before painting over new plaster.
Q: Why is the paint peeling on my new plaster?
A: When paint begins to peel from plaster, it is usually because it has lost adhesiveness with the surface behind it.
A mist coat is extremely important to ensure your paintwork doesn’t peel and flake from the wall. New plaster needs a
substance to bond to it before it can hold normal paint.
Mix paint with water at a ratio of 70:30 and apply a thin layer
to fresh plaster before painting. The water will be absorbed by the new plaster and will bond with the material, creating
a perfect base for paint. If your paint is peeling, it may be a case of scraping off the paint and starting again.
Q: How do I prepare new plaster for painting?
A: To prepare your new plaster for painting, first make sure the surface is 100% dry, clean and free of dust.
Mix up a mist coat using paint and water at a ratio of 70:30. Apply a thin layer of this emulsion over the new plaster
and examine any imperfections.
Once dry, any bumps or uneven patches will be visible. Sand over these lightly with fine sandpaper.
Then apply another thin layer of the mist coat and wait 24 hours for this to dry before applying normal paint.
Q: Why are there cracks in my new plaster?
A: Cracks in new plaster are most commonly caused by shrinkage. This is due to factors that have forced the plaster to dry too quickly.
If you switched on your central heating while your plaster was drying, or the weather is extremely hot, plaster can dry out too rapidly
and crack. These cracks are usually harmless and can be fixed using a bit of caulking.
Sources
- https://home.bt.com/lifestyle/house-home/diy-ideas/5-things-you-need-to-know-before-painting-freshly-plastered-walls-11364170736558
- https://www.valsparpaint.co.uk/help-advice/how-to-paint-new-plaster/
- https://www.realhomes.com/advice/how-to-paint-on-new-plaster
- https://www.hunker.com/12610789/how-to-determine-if-the-cracks-in-walls-are-serious
- https://www.homyze.com/blog/step-by-step-how-to-repairing-plaster-walls/
- https://propertyworkshop.com/plasterwork/how-much-to-plaster-a-room/