How to Lay Decking Yourself
This step-by-step guide to laying decking yourself takes you from the planning and measuring to the building of the framework and the board installation.
At the end of these steps, you’ll find handy lists of tools and materials to help you prepare to lay your decking. Here’s how to build decking:
Step 1
First, decide where you want to place your decking in the garden. Does the area have the right amount of sun or shade for your needs? Is it overlooked by neighbours? Is the ground stable enough to support decking?
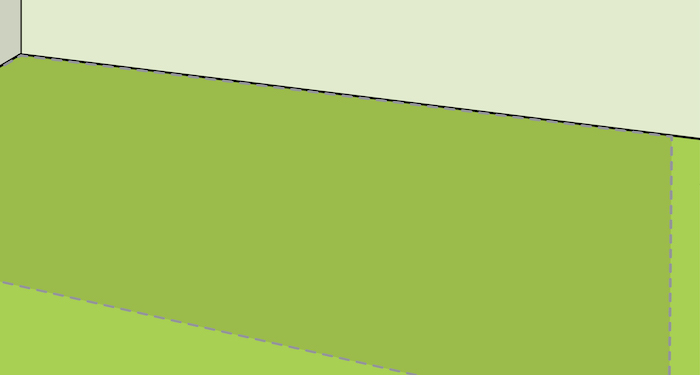
For example, a boggy area of garden probably isn’t the best place to build timber decking. It won’t be stable ground, and the timber is likely to rot. And you’ll need to make sure it doesn’t cover any important features such as a manhole cover or house airbrick.
Step 2
Next, draw out a plan to scale of your desired decking area on a piece of paper. This will help you calculate the exact amount of materials you need. It will allow you to work out how many decking boards and joists you’ll need. Of course, you should allow for wastage and mistakes.

Measure out your planned deck size in your garden or yard and transfer your measurements to your plan. The height of your deck should also be factored into your plans.
Think carefully about the height. A decking that’s tall may need steps and rails to make it safe, and if you’re building decking next to your house’s exterior wall, then it will need to be 15cm below the damp-proof course.
Step 3
Once you’ve got your materials and tools, you’re ready to create the foundation for your decking to sit on. Existing hard surfaces such as concrete or patio slabs needn’t be dug up, as these will make a good base for your new decking.
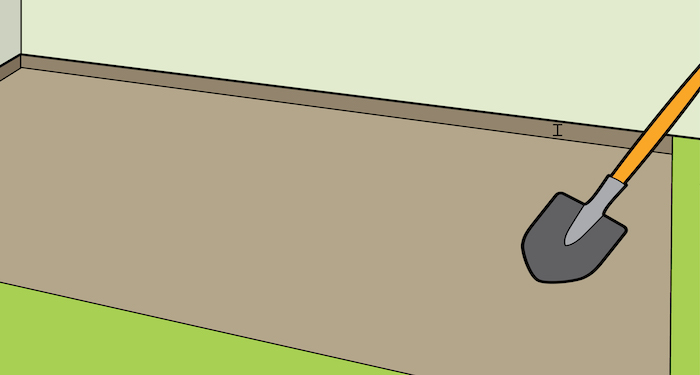
If you’re laying decking onto a soft surface, such as lawn or soil, then a little prep is required. Dig out the ground where your base will sit to around 5cm. Then, unroll some landscaping fabric to prevent the weeds from growing up through your decking. And scatter a good layer of gravel on top.
Alternatively, you could lay some patio slabs in a bed of gravel to create your solid base.
Step 4
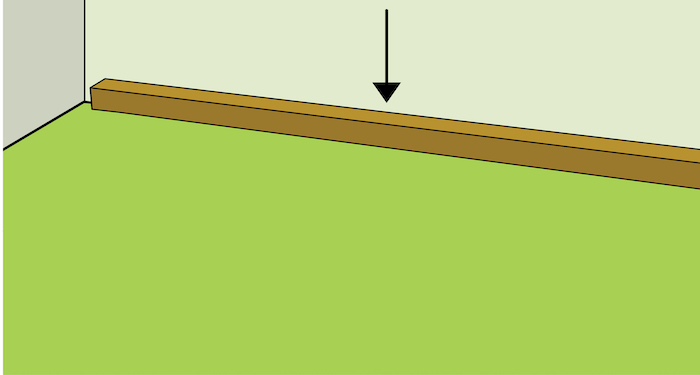
Securing your structure is essential to creating stable decking. If you’re building your decking up against your home’s exterior wall, then fixing the wall plate first will help do this.
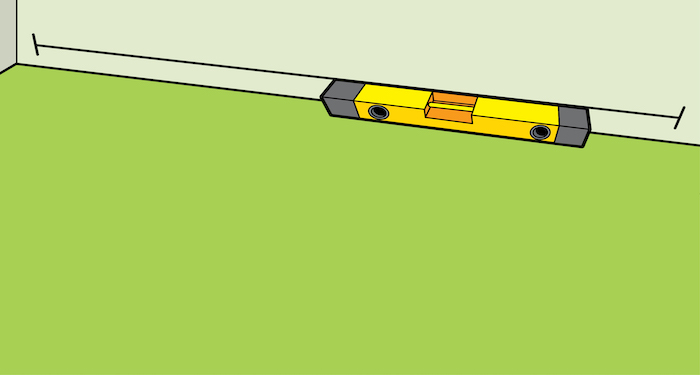
To start, mark out where the framework of your decking will sit against the wall. If your decking is outside a back door or patio door, then you’ll need to make sure the decking frame is set at the right height for your doorway.
The easiest way to do this is to take an offcut of the decking board and place it underneath the door frame. Now make a pencil mark underneath. This will give you the correct height for the decking framework – although you should leave a few millimetres to allow for expansion of the wood.
Now, use a spirit level to extend your mark along the length of the wall.
Step 5
Now you can measure and cut your first joist. This will be attached to the wall, so it needs to be the width of your decking area. Once it’s cut to size, measure 100mm from the end and make a mark with your pencil and create a vertical line on the wood with your set square.
Make two more marks 50mm from the top and bottom edge of your joist. These marks are where your fixings will go. Make two pencil marks in the same way at the other end of the joist, and then again at every 600mm along the complete length of your joist.
Take your electric drill and make pilot holes on each mark, ready for your fixings.
Brush a little wood preservative onto the cut ends of wood and over the pilot holes to protect the wood.
Step 6
Now you can secure the first part of the outer frame to the wall. The top of the joist should be level with the pencil line you made on the wall.
You may need an extra pair of hands to help hold the joist in place. Use a 7mm masonry bit to drill your first pilot hole in the wood, using the marks you made.
Make sure you drill through to the wall behind the wood. Repeat this for all of your markings.
Take your joist away and make sure your masonry holes are drilled properly. Next, you should tap a plastic wall plug into each wall hole to create a secure fixing for your screws.
Push 130mm screws through the predrilled holes in your wood and fix rust-proof washers onto the end of the screws, so you can create a 10mm gap between the joist and the wall.
Secure your joist onto the wall using your electric drill and driver bit.
This joist is known as the wall plate and should keep your decking firmly in place. If you’re not attaching your decking to a wall, then you won’t need to attach a wall plate.
Step 7
The next step is to complete the construction of the decking’s outer framework. It’s a good idea to allow a slight slope to your decking. This will help rainwater run off the surface. The easiest way to calculate this is to have about a 2mm fall per metre of decking you lay.
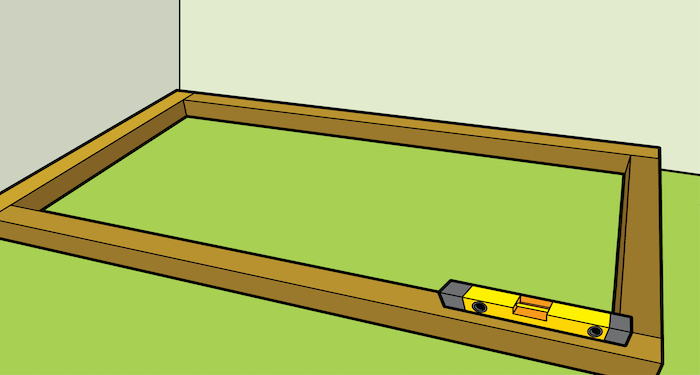
Position your joists to create a square or rectangular frame to match your decking plan. You may need to use risers or weatherproof offcuts to support your joists at the right height.
Get your outer framework into position, checking with your set square that the corners are at right angles. Again, you may need an extra pair of hands for this task. Check that your joists are flush at the corners.
Now, take your drill and make two pilot holes in each corner of this outer framework to join the wood together. Now screw in 150mm screws into each pilot hole. If any of the corners are difficult to drill into, you may need to offset the holes by drilling at an angle.
Step 8
Next, you’ll need to mark out where your supporting joists need to go inside your framework. These may be fitted horizontally or vertically, depending on what pattern your decking boards are going to follow.
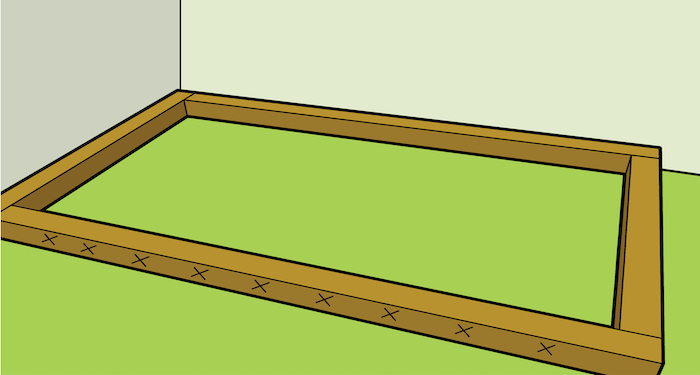
For example, if your decking boards are being fitted horizontally, then your joists will need to run vertically in the frame.
Joists should be fitted at 400mm intervals to provide enough support for your boards. Measure inside your frame and mark up where these joists will need to go. Then measure the lengths of joists and cut to size so that they fit inside the outer framework.
Step 9
Now, you’re ready to fit your internal joists. Metal hangers should be fitted to each end of your joists, secured in place with 30mm screws. Once you’ve done this, line up each joist edge up with the 400mm marks you’ve made on your outer framework.
Before you secure them in place, make sure they are flush with the rest of the frame, so your decking boards can sit flat on top. You may need someone to help you hold each joist in place.
Mark out and drill two pilot holes where each internal joist meets the frame. The holes should be spaced 40mm from the top and bottom of the frame. An 8mm drill bit is ideal for this task.
Now you can use 100mm screws to secure each joist in place. Once you’ve done this, you can secure the joist hangers onto your framework with your 30mm screws. This should create a sturdy frame.
Step 10
Now it’s time to measure, prepare and fit your noggins. These will provide extra support to the frame and decking boards. The noggins need to fit between your internal joists at spaces no greater than 1200mm. So, measure and cut enough noggins for the whole framework.
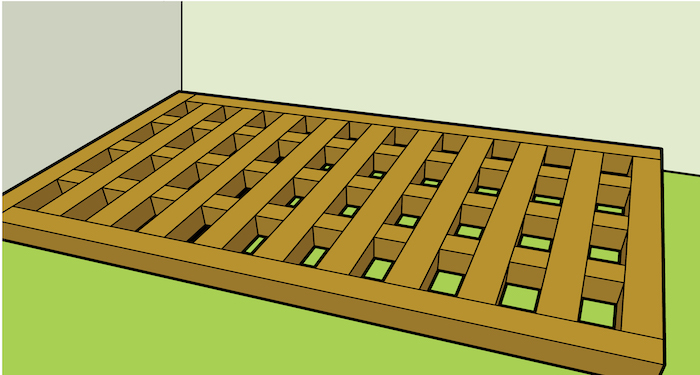
You can stagger these to avoid having to drill fixings near to your other screws. Fit these using the same method you used to secure your joists to the outer framework, with two screw fixings at each noggin end. Again, make sure your noggins are flush with the rest of the frame.
You may need to add more risers underneath the framework to support it at 500mm intervals. Check you’re happy with the level of your frame, then you’re ready to move on to adding the decking boards.
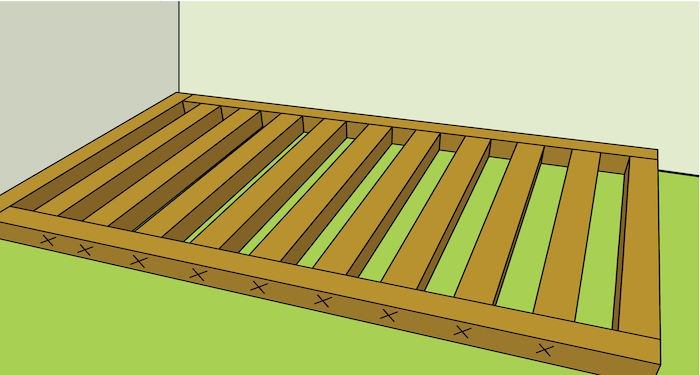
Step 11
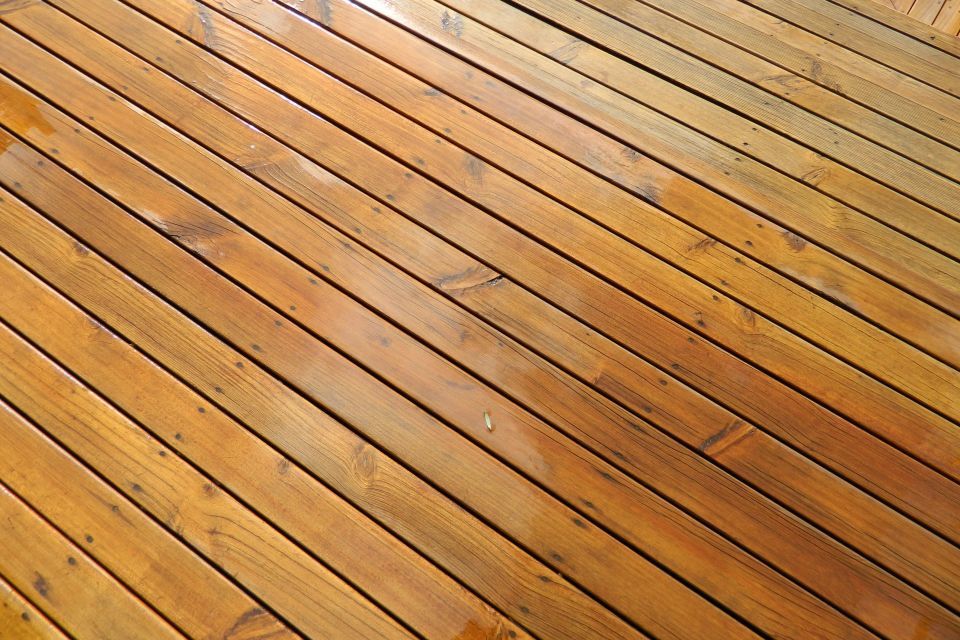
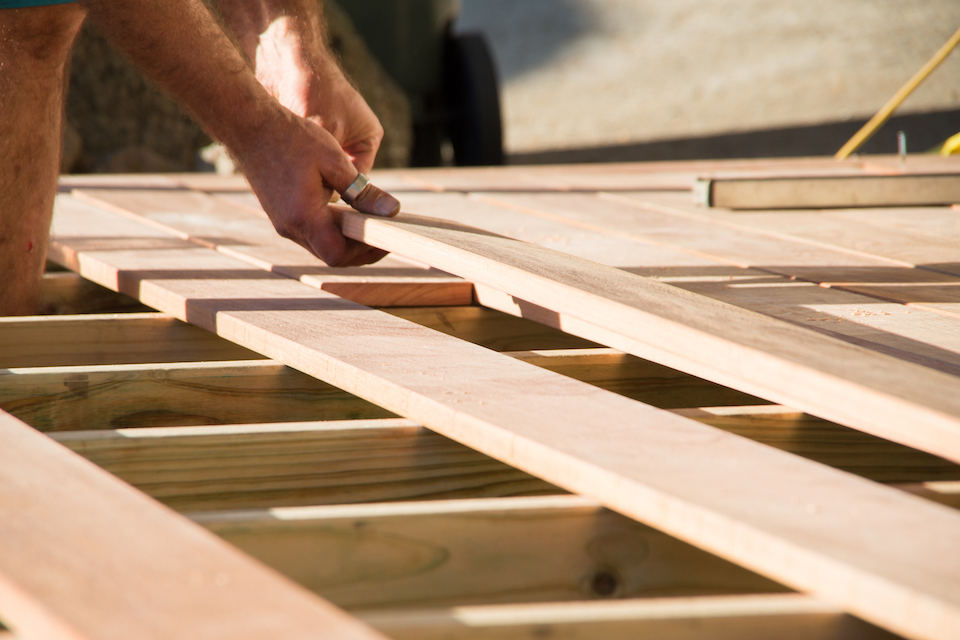
How you lay your decking boards will depend on what pattern you want, but straight lengths of boards are the easiest to fit. Ideally, your decking boards will be the same length as your frame, but if not, you’ll need to measure and cut them down to size first.
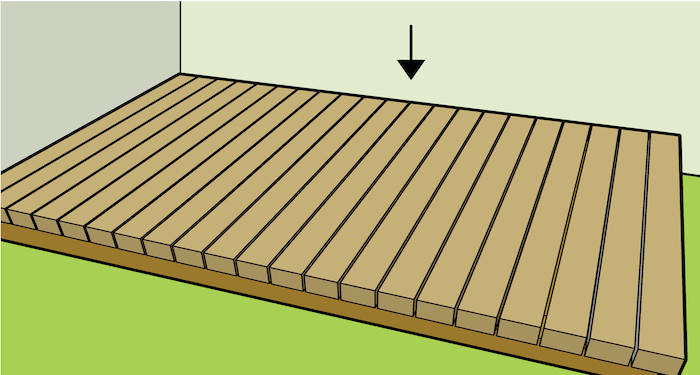
If the size of your framework means you’ll need to cut a decking board lengthways, then you should aim to lay this board where there will be the least foot traffic.
If you’re planning to attach decking boards to the sides of your decking framework, then you’ll need to position your boards on top of the framework with a small overhang. This overhang should be the same width as your decking boards.
Step 12
As before, drill pilot holes into your decking boards before screwing them to your joists. This will make the task easier. Make sure your holes aren’t too close to the edge of the board, otherwise the wood may split.
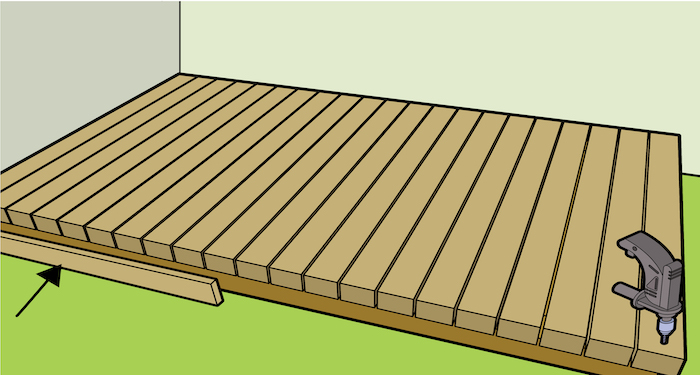
Again, an extra pair of hands will help you keep boards in place while you drill your holes. For a professional finish, you can make screws flush with the wood by using a countersink bit first.
Start fixing your screws into the boards, beginning with the ends first. Each board needs two screw fixings at every joist for a secure fit.
You need to leave a small gap of around 6mm between each board to allow the wood to expand. Use wood offcuts or other similar material to act as spacers to help you maintain an even gap.
If you’re adding decking boards to the sides of your framework, use the same process and leave an expansion gap. Measure and mark on your boards so you know where to drill your pilot holes.
Tools to Install a New Deck
You’ll need quite a few tools to help you lay your garden decking. Although every decking project is a bit different, you will need the following tools and accessories:
- 2mm drill bit for the pilot holes
- 7mm masonry drill bit for installing the wall plate
- 6mm countersink drill bit
- Jigsaw for cutting wood to fit around any obstacles such as downpipes
- Circular saw
- Hand saw
- Spirit level
- Drill for making pilot holes and driving in screws
- Tape measure
- Workbench and clamps to secure your wood whilst cutting
- Paintbrush
- Set square
- Sandpaper
- Hammer
- Pencil
Safety Equipment to Lay Decking
When laying decking, it’s important to keep yourself – and anyone helping you – as safe as possible.

So, make sure you’re wearing protective clothing and equipment is essential. It’s a good idea to make sure you have the following before you start building your garden decking:
- Safety gloves to protect your hands
- Safety glasses or goggles to protect your eyes from sawdust and other particles
- Safety mask
- Ear defenders to protect your hearing when using power tools
- Work boots to protect your feet when laying your framework
Materials to Build Decking
Getting the right materials for your decking is important to create a strong and stable platform for you to use. For example, decking joists need to be made from exterior grade wood as they’ll need to withstand the outdoor conditions.
It’s also essential to use the right screws for the job, as these will need to be weatherproof and suitable for fastening wood. Here’s what you will need:
- Decking boards
- Exterior grade wood for joists
- 64mm decking screws
- 100mm timber drive screws
- 150mm timber drive screws
- 100mm coach screws
- 7mm wall plugs
- Flat square washers
- Joist hanger
- Adjustable decking risers
- Preserver for protecting the cut end of your wood
How to Prepare to Lay Decking
Preparation is an important part of any decking installation. And there’s plenty you can do in advance of the build.

First, if the decking is to sit on soft ground, you’ll need to clear this of any vegetation such as shrubs or weeds. If it’s being built on an existing patio, you’ll need to clear this of garden furniture, planters and any other objects.
Decide whether you prefer the look of timber or composite decking boards and what pattern you like the look of. Visit your local DIY store and look at the different materials in person.
Also, create a checklist of all the tools and safety equipment you need using our handy guide. Check over your tools to make sure they’re in good order, and that battery packs are charged up.
Anything you’re short of, you can add to your shopping list and get at the same time as your materials. If you’re having decking boards delivered, make sure you’ve sorted out space and access, ready for the delivery.
To help you decide on the size and location of the decking, you may like to set your garden furniture up in different areas of the garden at different times of the day.
This will give you a better idea of what works best and how much space you’ll need. You can use chalk spray to mark out the area first.
Decking Maintenance
Maintaining your garden decking properly will ensure it lasts for a long time. So, here’s some of the routine jobs you should do to keep your decking boards clean and in good condition.
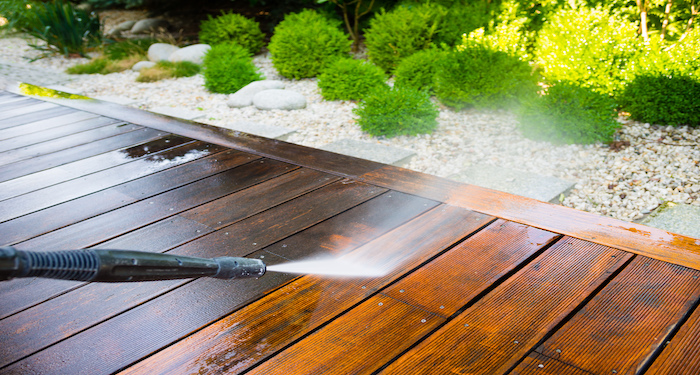
To keep your decking clean, regularly sweep with a stiff broom. Wooden decking, especially when it’s in a shady location, will need more maintenance. Moss and algae can build up quickly, making the surface slimy and dangerous to walk on.
So, power washing is a good option, but you may also need some dedicated decking cleaner or warm soapy water to help remove stubborn dirt and stains.
Some composite boards can’t be power washed, so you’ll need to make sure you follow the manufacturer’s guidelines when cleaning. You should be able to clean it with some warm soapy water and a brush but do check before you start.
Keeping wood in good condition will prevent it from rotting away. There are many different protective coatings you can use on your deck, including oil, stain, sealant and decking paint. These will need reapplying every so often to keep it properly protected.
Finally, it’s a good idea to check over your decking as the seasons change. A visual inspection to check for weaknesses such as splitting wood and general wear and tear will help catch problems before they get too big to deal with.
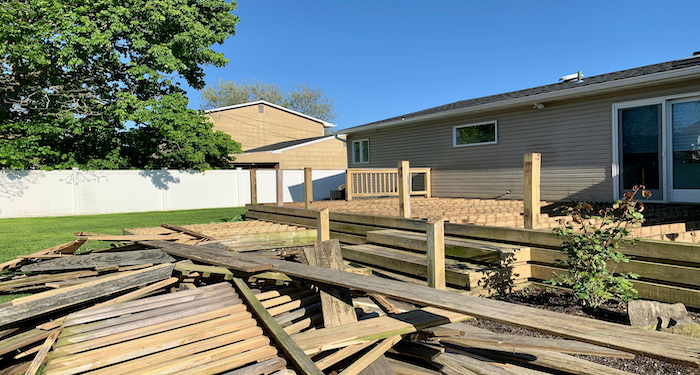
How to Remove Decking
Of course, there are times when you need to remove decking boards or decking tiles. This may be because you’ve moved into a home where an old decking area or badly maintained deck isn’t safe or needs replacing. Removal of garden decking can be just as labour-intensive as building it.
Here’s what you should do to take it apart:
First, move any garden furniture out of the way. Then, if there are handrails to remove, you should start to work on those. You’ll need to try to remove the fixings, which are likely to be screws. Use the reverse mode on your electric screwdriver or driver-drill to remove them.
Now, you can get to work on removing the decking boards. These should also be screwed down, but if they’re nailed down or stuck firmly, you could try prising them up with a crowbar or cutting the boards out with a saw. Be careful not to saw through the fixings though, just the wood.
Now, you’ll be able to see the framework. Take out as many of the fixings as you can easily remove. Depending on how loose or rotten the wood is will determine how easy the frame is to dismantle. Try to prise joists apart with a crowbar if you can.
For tougher frames, use a mallet or sledgehammer to tap the joists apart. Remember to wear safety equipment when trying this.
For well-built decking or decking with concreted posts, it may be wise to hire a professional to help remove your decking safely.
Try to repurpose any wood that isn’t rotten and dispose of waste materials at your local recycling centre or hire a reputable waste removal company to clear it away.
FAQs
Q: Can I paint decking boards?
A: Yes, you can paint decking boards. However, you will need to prepare them properly first and use a suitable exterior paint. You’ll need to thoroughly clean the boards first and remove any old stain or oil.
This can be done using a scrubbing brush, suitable decking cleaner and decking stripper if necessary. Leave some time for the deck to dry out properly, and then apply your paint with a brush or paint pad.
You may need several coats of paint, so it’s a good idea to choose a warm, dry day and make sure no one needs to access the garden via the decking.
Q: How many decking boards do I need?
A: The number of decking boards you need will depend on the size and shape of your deck, as well as the pattern you choose to lay your boards down.
Drawing a plan of the deck with the measurements will help you work out the number you need. Always allow for cutting mistakes and wastage when calculating materials.
Q: Are composite decking boards or timber decking boards better?
A: You should choose the material you think will suit your needs better. Composite or plastic decking, such as Trex decking, can offer a low-maintenance and durable option.
It’s also available in a selection of colours. However, you may prefer to use timber for a natural look and greater choice of finishes from decking paints and oils. Although you will need to reoil, stain or seal the deck from time to time.
Both materials will require seasonal cleaning and inspection, so it’s down to your personal preference and budget.
Q: Do I need to stick to a square decked area?
A: No, you can create a decked area in many shapes. However, if you’re installing the decking yourself, you should keep it as simple as possible. That’s why square and rectangles are so popular.
If you’re hiring a professional to install your decking, it’s a good idea to use their knowledge and ideas to work out what will look good and suit your needs best.
Q: How do you make decking safer for young families?
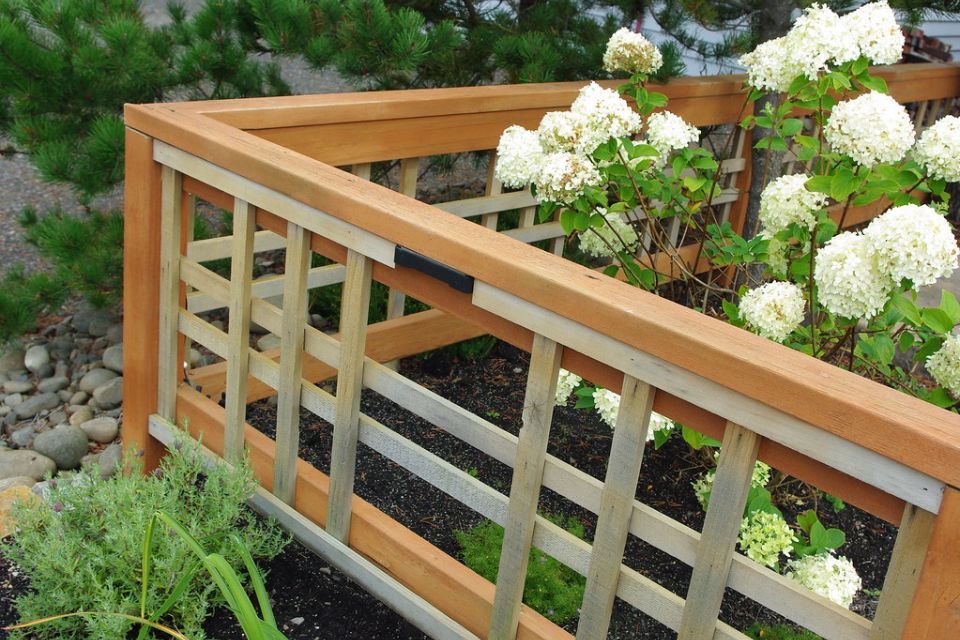
A: Decking makes a nice addition to a family garden, but there are ways to make it safer for young children and older family members. Non-slip decking is a good idea for the edges or steps on a deck.
Handrails and safety rails are also worth considering, especially if the decking frame is quite high. And keeping your decking clean and free from algae and moss will prevent the surface from becoming slippery.
Sources
- https://www.youtube.com/watch?v=340U2Wk4vP4
- https://www.diy.com/ideas-advice/how-to-plan-decking/CC_npci_100129.art
- https://www.diy.com/ideas-advice/how-to-paint-stain-or-oil-your-decking/CC_npcart_400188.art
- https://www.decks.com/how-to/articles/can-you-stain-or-paint-a-composite-deck
- https://www.housebeautiful.com/uk/garden/designs/a524/how-to-clean-decking/
- https://uk.trex.com/trex-owners/care-and-cleaning/
- https://ultradecking.co.uk/how-do-you-pull-up-decking-boards-without-damaging-them/
- https://armstrongsupplies.co.uk/blogs/faqs/how-to-demolish-a-timber-deck