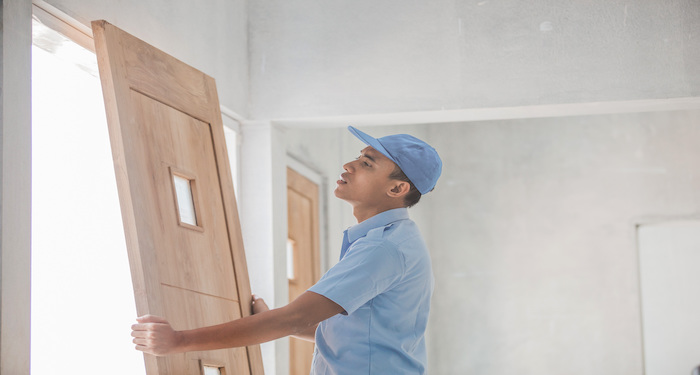
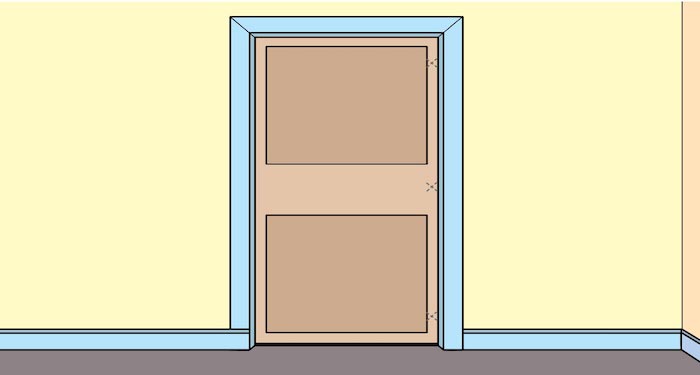
How to Hang a Door Yourself
Here is our step-by-step guide to hanging a door. Before following these steps, make sure you’ve prepared your space, got the tools and materials you need as well as the right protective equipment. After these steps, you'll find a few handy checklists to help you.
Step 1
First, you’ll need to grab a tape measure, so you can work out the size your door needs to be. Measure the height from the floor to the top of the doorframe and then the width.
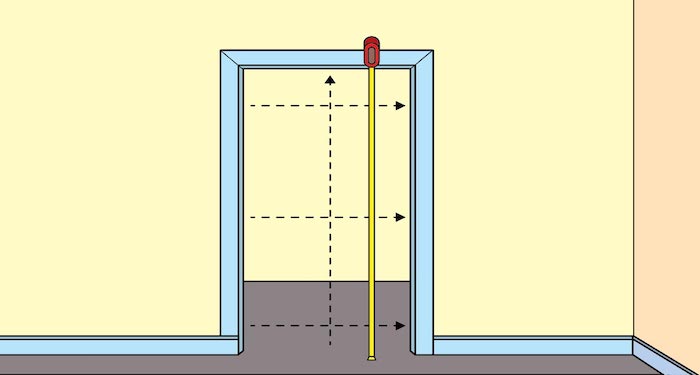
It’s a good idea to take three measurements for the width: one at the bottom, one in the middle and one at the bottom of the frame. Make a note of these measurements.
Step 2
Next, take your door and make sure it’s positioned the right way around. To help you orientate it, the correct direction should be printed on the edges of the door.

There should be an arrow pointing to the side where the handle should go. If this isn’t clearly marked, you can draw a large arrow along the edge to help guide you.
Step 3
Now, you’ll need to check whether your doorframe is square and plumb. To do this, take your spirit level and rest it against the vertical part of the doorframe.
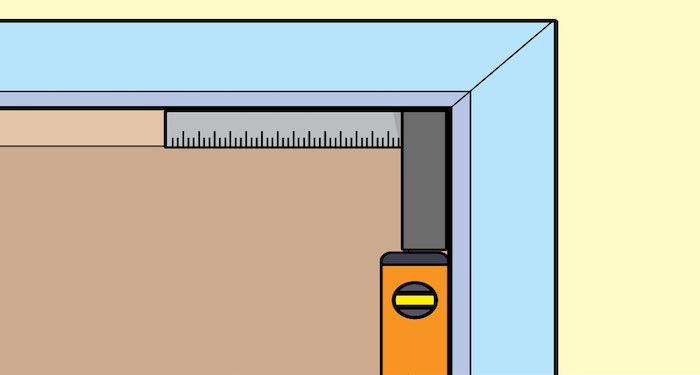
Check the bubble on your spirit level rests between the two guidelines. Now put your set square up to the corner of the frame to see if it's nice and square. Ideally, it should fit in each top corner snugly.
Step 4
For the next step, take your measurements and transfer them to your door so that you can plane it down to size. Start with the height, measure from the top down, and mark the bottom right and left sides of the door.
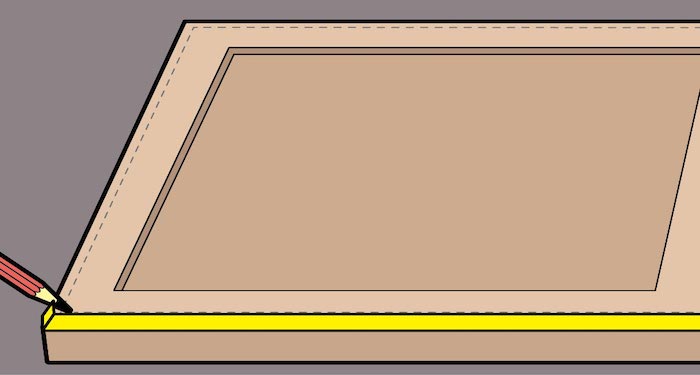
Now, draw a straight line across using a pencil and metal rule, and this will give you a clear guideline for cutting the door height to size.
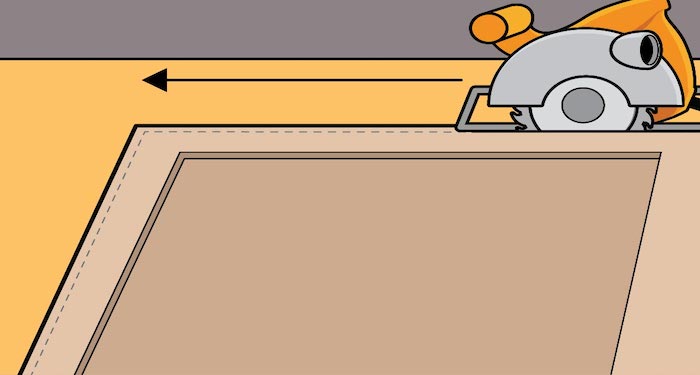
Step 5
Now take your circular saw and set it so that the teeth of the saw are lined up with your pencil mark. Trim along the bottom with the saw. Then, smooth off the cut edge using a sheet of sandpaper.
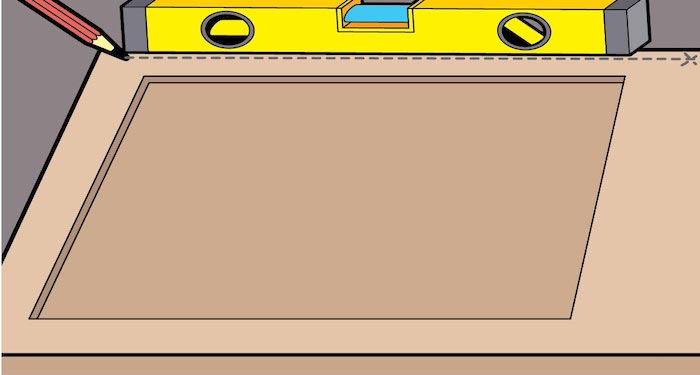
Step 6
The width measurement will need to be transferred to the door next. Mark the bottom, middle and top of the door with your measurements and draw a straight line along the length of the door to join your three marks. This is your next guideline for trimming the door.
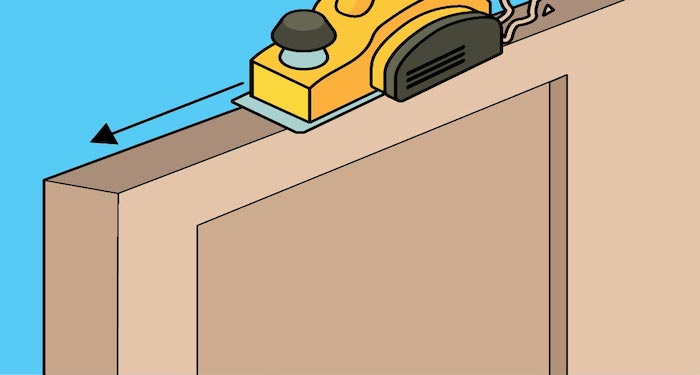
Step 7
Take your electric plane and run it along the edge of your door to take off the excess up to the guideline. You’ll need to apply a firm amount of pressure to the plane to remove a straight, even slice of the door. Again, you may need to smooth the cut edge using sandpaper.
Step 8
The next step is a little bit fiddly, so you may need an extra pair of hands. You may also need some wedges and two pence pieces to help you fit the door correctly in the frame. The ideal gap around the right, left and top of the door is the width of a two pence coin.
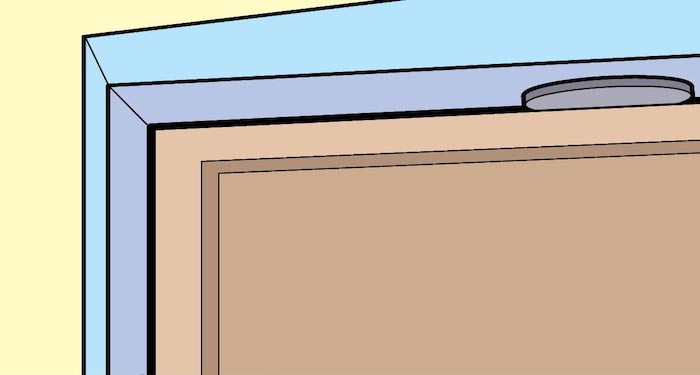
So, you can use the coins to make sure you have an even and correct sized gap. To hold the door in the right place, use your wedges and adjust them until you’re happy with where your door is positioned.
Step 9
Now you’ve got your door in the desired position. You can mark where the hinges should go. You should have three indents in the doorframe where your old door hinges went, or new hinges will go.
Mark these on your new door so you know where to fix the hinges. You only need to make one mark where the bottom of each hinge should be.
Remove your door from the frame. Take one of your door hinges and line up the first mark with the bottom of the hinge. Now, draw around the hinge, so you’ve marked the width and depth of it onto your door. Repeat this for the other two hinges.
Step 10
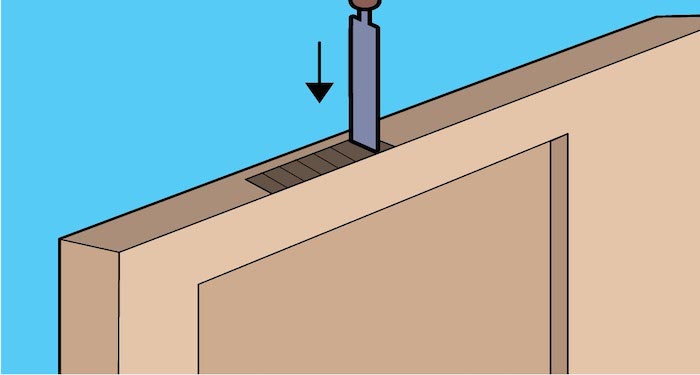
Next, you’ll need some sharp wood chisels and a wooden mallet to create the indentations for your hinges. Use a suitably sized chisel to mark around your hinge outlines on the door.

It’s best to keep just inside the pencil line and make light taps until you’ve created a thin groove. Then, take a chisel and start chopping out the wood inside your chiselled lines.
Don't try to take out too much wood at once, as you may cause it to split. The best method is to tap the chisel down at 4-to-6-millimetre intervals before using the chisel’s flat edge to remove the wood.
To check you’ve removed enough wood, you should now be able to fit each hinge in the chiselled-out sections. Whilst the hinges are in place, mark where each screw hole should go with your pencil.
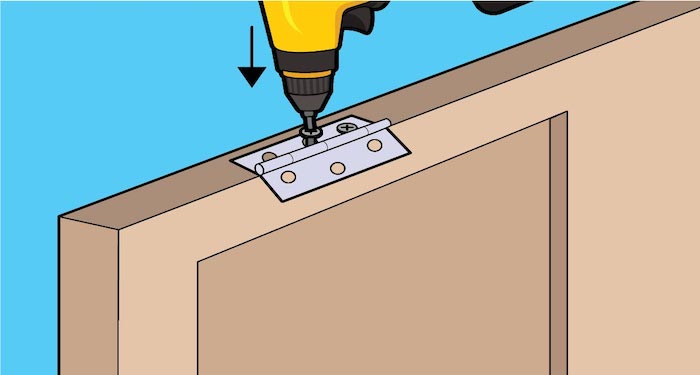
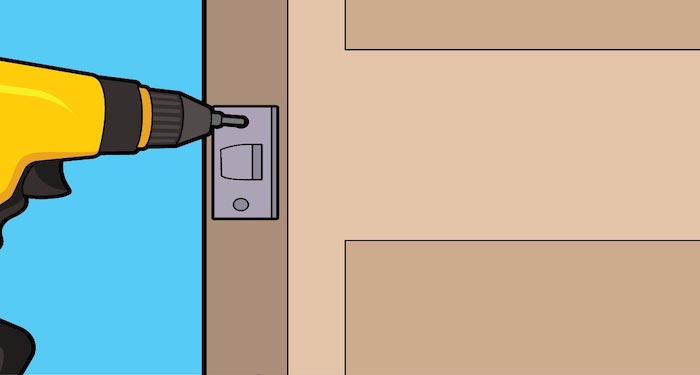
Step 11
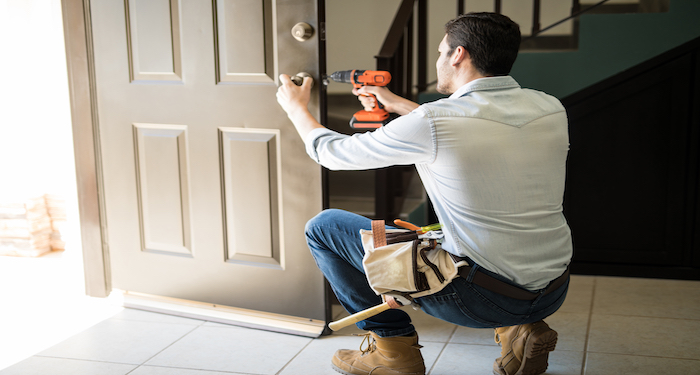
Taking an electric drill with a suitable drill bit, make some pilot holes for the hinge screws on your pencil marks. The drill bit should have a smaller diameter than your screws. Now it should be easy to screw on each of your hinges to the door using your electric screwdriver.
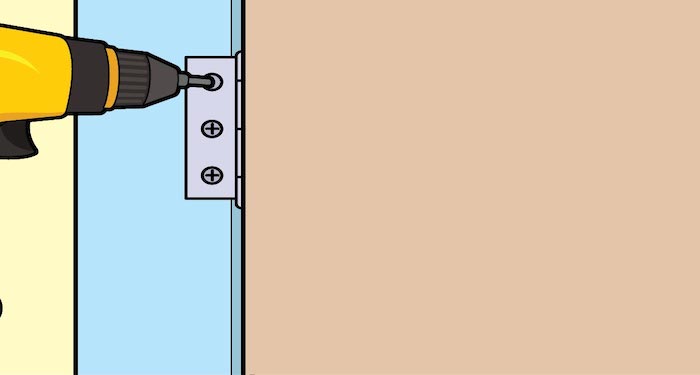
Step 12
Next, it’s time to position your door in the frame. For this, you will need your wedges again or an extra pair of hands to help you.
Line up the hinges on the door with the indents in the frame. Loosely attach the door to the frame by fixing a screw in the middle hole of each hinge using your electric screwdriver.
Now, gently open and close the door to check it fits correctly. If you’re happy, you can screw in the rest of the fixings to secure the door to the frame.
Step 13
You will now need to add your door handles and latch mechanism, so you can open and close your door properly. To fix this, you will need to make some guide marks on the edge of your door.
Take your pencil and mark where the centre of the strike plate needs to go onto the door, creating a straight line along the door edge using your set square. Use your tape measure to mark the centre of the door edge on this line.
Now, take a flat drill bit that’s just a little bigger than your latch, and a 22mm bit is usually the right size. Take a piece of masking tape and wind it around your drill bit’s arm at the same depth as your latch.
This will guide you on how far you need to drill into the door edge. Holding the door open with the wedges, drill into the door edge where you made your centre mark.
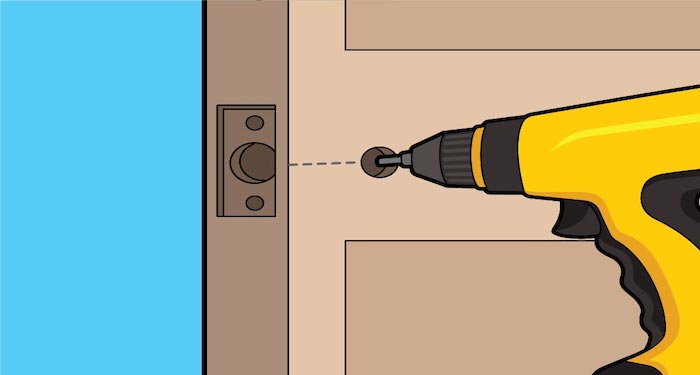
Step 14
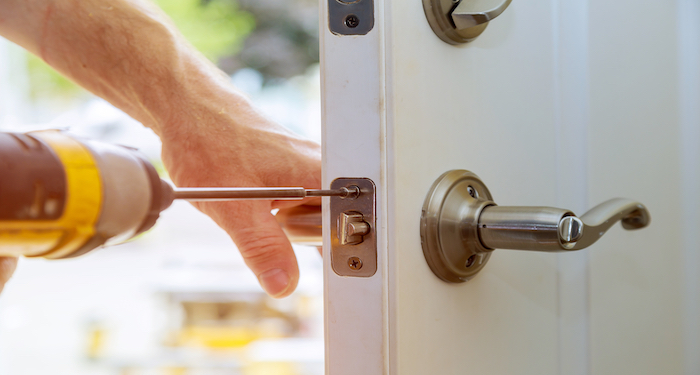
Pop your latch’s strike plate over the hole and mark around the plate in pencil. Now, using your chisels, remove the wood inside your guideline to the depth of your strike plate.
Again, tap your chisel inside the lines to create a groove and then use the flat edge to remove the wood. Now, check your strike plate fits flush on the door edge.
Whilst it’s in place, drill your pilot holes for the screws. Because the screws also need to sit flush on the door, use a countersink bit to make indents for the screws to fit into.
Step 15
Next, you’ll need to create a hole for your handle’s latch bar. To do this, hold your latch at the correct height on the outside of the door and make a pencil mark where the hole for the bar should go.
Take a suitable flat drill bit. A 13mm one is often the right size. Use this to make the hole through your door. It’s a good idea to drill through from both sides rather than through from one side, as this can cause the door veneer to chip or split.
Now you can pop your latch mechanism in place and secure it with your screws. Then take your latch bar and slot this through the hole you made.
Step 16
Finally, it’s time to attach the handles. Close the door and slide your first handle over the latch bar. Now, take your spirit level and check the handle plate is level. Holding the grip firmly so it doesn't slip, drill your pilot holes for the screws and then fix them in place with your screws.
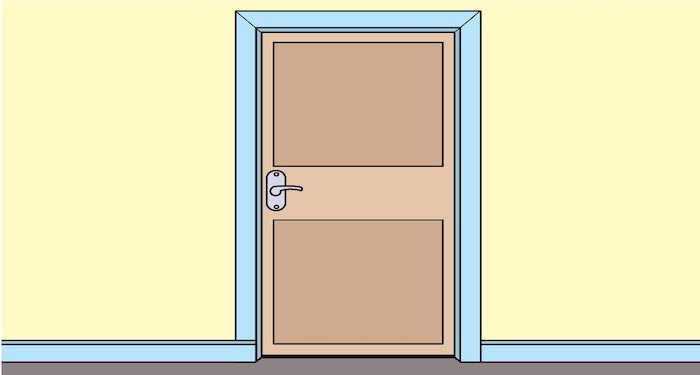
Repeat the process for the other handle on the other side of the door. Give your door a quick test to make sure it all works properly and you're all done.
Tools to Fit a New Door
You’ll need a range of door hanging tools to complete your door fitting. If you’re not confident with power tools, it's wise to get someone to help you or hire a professional.
Here’s the complete checklist of tools you will need to hang a door:
- Tape measure
- Spirit level, one small and one long level
- Pencil
- Set square
- Circular saw or handsaw
- Electric plane
- Clamps to hold your door in place whilst cutting to size
- Sandpaper that’s suitable for use on wood
- Electric drill
- Set of drill bits, including flat bits
- Screwdriver
- Set of sharp wood chisels
- Wooden mallet
Safety Equipment to Hang a Door
When taking on DIY tasks, you should always have the right safety equipment. Dust and other small particles can damage your sight. Also, the noise from power tools can damage your hearing.

So, here's what you should use to keep you safe when hanging a door:
- Safety goggles
- Dust mask
- Ear defenders or plugs
- Protective work gloves
Materials to Fit a New Door
Here are the basic materials you’ll need to hang your new door. Some are obvious, but there are a few handy extras that will make the door hanging job easier:
- Your choice of internal door
- Three-door hinges
- Door handles
- Latch mechanism
- Fixings (latch bar and screws)
- Wood or plastic wedges for holding the door in position when fitting
- Twopence coins to help you position the door
- Masking tape to create a guideline on your drill bit
How to Prepare to Install a Door
Installing a door isn’t too difficult, but first, you'll need to make a bit of space. Make sure you have room to work without accidentally bumping into furniture or knocking things over. It’s a good idea to make some space on both sides of the doorway.
You’ll also need some space to work on the door whilst it’s out of the frame. This may be indoors or outdoors. You may prefer to work near the doorway to avoid carrying the door back, and two or you may wish to work outdoors to minimise sawdust in the house.
If you’re working indoors, it’s a good idea to open windows, to allow some ventilation when you’re planing and sanding.
If you’ve got an old door to remove, you’ll need to unscrew this first. If you're reusing any of the door furniture, keep this somewhere safe, so you don't lose any of the bits.
Once the door is out of the frame, it’s a good time to clean up or repaint the framework while you have good access to it. You’ll need to leave plenty of time for the paint to dry before hanging your new door, though.
Before you begin hanging your new door, it’s a good idea to check you have all the tools and materials you need. You don’t want to get halfway through the task and find you’re short of something for your door installation. You can use the checklists for this.
If your new door is made from wood, it’s wise to let it acclimatise to the room. Ideally, you should keep it flat in the room where it’s to be installed and leave it for about a week.
Door Maintenance
Doors are often in high-traffic areas of the home and see a lot of use. So, a little maintenance could help keep your door in good condition.
Wooden doors or doors with a wood veneer can be kept in good condition by maintaining their surface properly. Recoating with varnish, stain, oil or paint from time to time will help keep them in good condition.

Keeping doors and handles clean will also help maintain the surface, and they will look good. You should follow manufacturer guidelines on what type of cleaner to use. However, a duster and wood polish should clean varnished or stained doors. Painted doors can be wiped down with a damp cloth and mild cleaner such as washing up liquid.
Glazed doors can be cleaned with a window cleaner or warm water and vinegar, buffing them dry with a clean cloth. Handles are made from various materials, so you should clean those with a suitable commercial cleaner, followed by the correct type of wax for the metal.
Oil your hinge and latch mechanisms if the door is difficult to open and close, and this will avoid damage to the moving parts and prevent heavy-handed use that could damage the door.
Finally, it’s not just the door that may need maintenance but the framework and walls around the door. Keep your framework clean by vacuuming or dusting over, including around the hinges and latch hole to prevent them clogging up with dirt and dust. Use a fixed or moveable doorstop to prevent handles from damaging walls.
How to Remove a Door
Before you fit a new internal door, you may need to remove an old one. And there’s one safe and simple way to remove a door that will also save you time.
First, you’ll need to prepare a few simple tools. Find a nail, hammer and flat head screwdriver. Take your tools and stand inside the room that your door opens into.
Now, fully close the door. You should be able to see the hinge mechanisms of your door poking out of the frame. Each hinge has a pin going through it, and you need to take out all three of these hinge pins to remove the door.
There are several ways to do this, depending on how tightly secured your hinge pins are, but the easiest way is to hold your nail upside down at the bottom of the hinge, then use the hammer to tap the nail upwards to dislodge the hinge pin gently.
Once the pin has moved a few millimetres, you can prise it up using your screwdriver or if it’s loose enough, pull it out by hand.
Once all three pins have been removed, the door should come out of the frame. You will need to open it a little with the door handle first. Then, taking the weight of the top of the door, gently pull it down towards you and lie it flat. It’s best to ask someone to help you do this.
The remaining hinges will be left in the doorframe, so you'll need to use the right screwdriver to remove these.
FAQs
Q: What’s the best paint for internal doors?
A: If your doors are made of wood, you have a choice of satin, gloss and eggshell paints. Which you use is down to personal preference. Gloss paint has a high sheen and is usually hard-wearing, although it can take longer to dry.
Satin has less of a sheen and is durable, with some paint brands being wipeable. Eggshell has a more matt finish that suits many modern interior décor styles but is less durable. If you’re painting on bare wood, you may need a primer coat first, depending on what type of paint you choose.
Q: How much does it cost to hang a new door?
A: Fitting a door can cost as little as £40 to hang. Popular internal doors such as flush or panel doors cost between £70 and £150 to supply and hang.
However, it may cost more if you need the door cutting to size and latches added. Any paintwork or framework jobs will also add to the cost. The material the door is made of can also affect the price. Solid oak doors will cost more than laminated or moulded doors with a hollow core.
Q: Do internal doors come in standard sizes?
A: In the UK, there is no standard door size, and many doorframes vary in size, depending on the age and style of the house. However, internal doors tend to come in four sizes, with edges you can cut or plane to fit your frame.
Many doorframes suit a 1981mm x 762mm x 35mm door size, although newly built houses often have wider doors for wheelchair access.
Q: What’s the best material for a door?
A: Hardwood is the traditional material for internal doors. It adds character, helps to keep out draughts and is easy to paint, stain or varnish to your tastes.
However, moulded MDF and hollow core doors can be easier to install and handle as they’re lighter, and they can also be more cost-effective. If your house or room is lacking natural light, a glazed door may be a good option too. But do make sure the door is fitted with glass that meets the British Safety Standard.
Q: Can I replace a door handle?
A: If your handle mechanism is broken or you fancy a change, you should be able to change your door handle by unscrewing the handle plate.
However, if you change handle style, you may be left with marks or holes from your old handle plate that need filling with a wood filler and then painting over.
Sources
- https://www.savoytimber.com/help-and-advice/how-to-take-a-door-off-its-hinges-and-how-to-hang-a-door/
- http://www.watfordpainterdecorator.co.uk/gloss-vs-satin-vs-eggshell/
- https://www.vibrantdoors.co.uk/news/?p=1986
- https://www.expressdoorsdirect.co.uk/blog/how-to-clean-internal-doors/
- https://www.youtube.com/watch?v=tizE31oU4Co