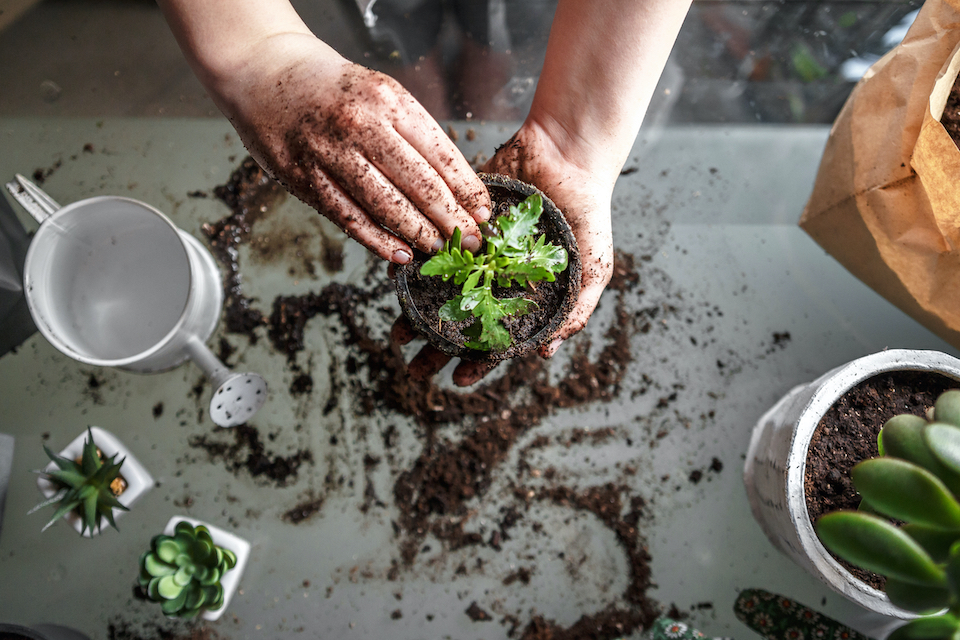
Introduction to Garden Edging
Boredom is the perfect opportunity to get creative, and get those things you’ve been staring at on your ‘to-do’ list done and dusted - And where’s best to start? The garden!
We’ll be running through the world of garden edging, and all its possibilities. From its purposes, to its styles and materials, landscape edging is limitless. If you’re looking for some gardening edging ideas, inspiration and how much it could cost - keep reading.
What Is Garden Edging?
Revamping your garden and looking for something to add a little aesthetic to your shrubbery? Edging is a simple yet perfect way to give your garden that little extra zhoosh.
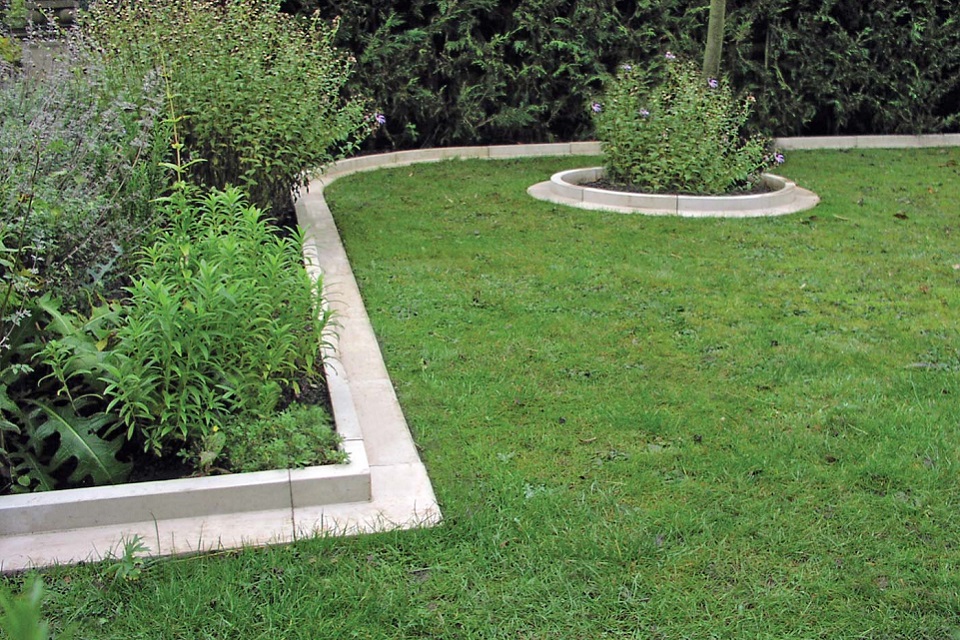
Edging is the technique of using materials, such as stone, to create a crisp line of separation between certain areas of the garden. This could be from separating your shrubbery from the grass, to creating a sharp line to transition from the patio area to the greenery and much more.
It has many uses, in both decorativeness and functionality - and it comes in a range of different looks and materials to cater for your personal style and practical needs.
Some of the many uses of edging are as follows:
Separating Shrubs from Greenery
Separating your flower borders from your grass can be both an aesthetic choice, and a preventative measure. If you’re looking for that sharpness in your garden, to give it a clean and tidy look, lawn edging is a great method to create a crisp line between the soil and the grass.
This can make a great focal point to the garden and create the illusion of a bigger space. Often lines placed in a strategic way can draw the focus of the eye in a specific direction, creating an increased perception of length or width.
We often hear this when we think of styling our clothing, horizontal lines can make a person look wider, and vertical lines can make a person look thinner and taller.
Therefore, using lines across the width of the garden can create the illusion of a wider space, and using lines across the length of the garden can give the illusion of a longer space.
As well as using it for an aesthetic purpose, garden border edging can be a great way to protect your plants from factors that may cause harm.
Strong edging materials can help you to avoid going too far off the grass with the lawnmower and damaging your plants, and it can also stop the grass from growing into the soil borders, spreading weeds which could kill off your plants.
On the contrary, grass edging can also prevent soil from spilling over onto the grass creating a mess or damaging the greenery.
Creating a Vegetable Garden
Fancy yourself as an avid gardener, and looking to create your own little allotment in the comfort of your own home? Growing vegetables can be a messy pass-time, and edging is a great tool to keep all the mess confined to one area.
If you fancy planting more than just flowers, a backyard vegetable garden makes a fabulous little focal point to your space.
A number of materials can be secured around the soil to keep the mess to a minimum and maximise the aesthetic.
Border edging can also prevent friends and family from walking onto the area accidentally and damaging your homegrown crops.
Transitioning Your Patio Area
Looking for a clean and simple way to separate your patio from the rest of the garden? Edging can be a fantastic technique to create that sharp aesthetic, or to slowly transition the materials of your patio into the grass or soil.
Using edging around your patio gives you a sharp line to work around when trimming the grass, making it more efficient when gardening. It also can prevent grass and soil from spilling over onto the patio area.
Patio edging can create a border around your seating area, which can make a fabulous focal point to your garden. As well as either sharply or gradually transitioning this area into the rest of the garden.
Pathway Edging
Paving edging can be used to distinguish a garden pathway from the surrounding area and keep the materials of the path separate to the grass and mulch around it.
This is a great option when you’re trying to grow your grass or plants and want to keep visitors from walking in these areas. It also creates a great focal point for the garden.
Creating Focal Points
Edging is a great tool to use when you want to emphasise certain areas of your garden, for example a pathway, shrubbery, an interesting tree, your patio, a pond - the list is endless.
There is no set look when creating a border for your focal point, as there are so many materials and styles that can be used. As well as creating the focal point, edging keeps the area untouched and prevents grass and soil from spilling over onto it.
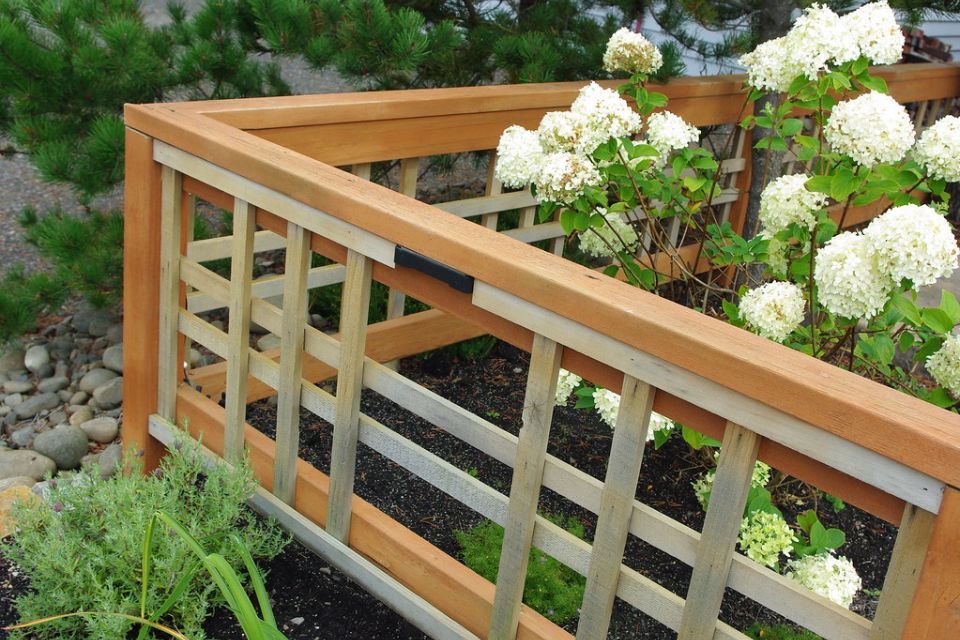
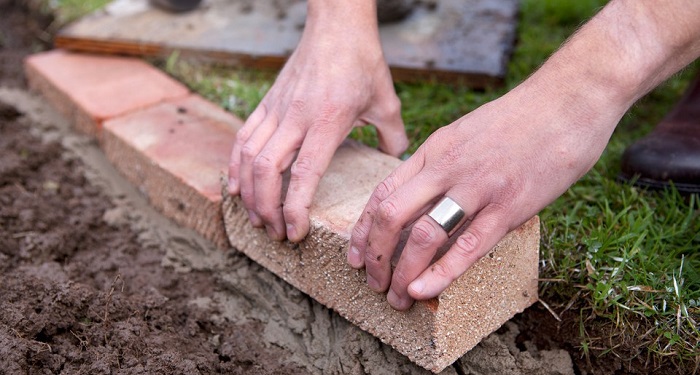
Brick Edging Ideas
When looking at landscape edging, brick is one of the most popular materials used in gardens and yards, mainly due to its clean look when matching it to the aesthetic of your home, it’s sturdiness, and the ease of purchasing it.
Brick is quite easy to get your hands on, and straightforward when creating simple yet sharp designs with. It’s one of the more effortless and effective options when choosing to create borders around your shrubbery, pathways and patios.
You can use multiple layers of brick to bring your edging up higher, or wider depending on the look you’re trying to achieve.
If you’re going for the more traditional feel, brick is the perfect go-to edging material. Bricks can be found in a variety of different shades and colours, which you can match to the colours of the surroundings or the shade of your home.
The Cost of Brick Edging
Although brick may be a popular option, it’s not necessarily the cheapest material to use. Bricks are usually priced per 1,000, as builders usually buy in bulk to construct homes and structures. However, they range in cost depending on the quality of the brick.
For lower end materials, you could be looking at around £400 per 1000 bricks, and for higher end materials you could be pushing £1200 per 1000 bricks. However, this all depends on what the brick has been made out of, for example concrete brick is generally cheaper than clay due to material costs and the manufacturing methods.
Before knowing the price, you will need to find out what type of brick is best for your needs, whether you want it to match your home, how you want it to look, and how long you want it to last. You can purchase bricks from most DIY or construction stores, or through building companies online.
You don’t have to purchase new bricks, you can also use old bricks to create a rustic and traditional feel, which is a more environmentally friendly option to your gardening. If you’d rather reuse bricks than buy new, you can visit a demolition or refurbished site and check if they have any materials you can take or buy from them.
You can also have a drive around your neighbourhood and check for skips with old brick material - just make sure you ask your neighbours first before taking anything.
If you cannot find anything like this close to you, there are many online methods of getting your hands-on old bricks that may be a more cost-effective option. There are many websites online selling reclaimed bricks to new owners, and even people on listing websites such as Gumtree and Preloved reselling old brick material to new homes.
Pros:
- Easy to match to the style of your home.
- Many different colours to choose from.
- Many different types of brick to choose from.
- Easy to find second hand.
- Easy to create sharp borders in your garden.
- Timeless.
- Long lasting.
Cons:
- New bricks can be expensive.
- Difficult to secure by yourself - may need professional help.
- Time consuming to install.
- Some bricks can be susceptible to the outdoor elements - maintenance may be required.
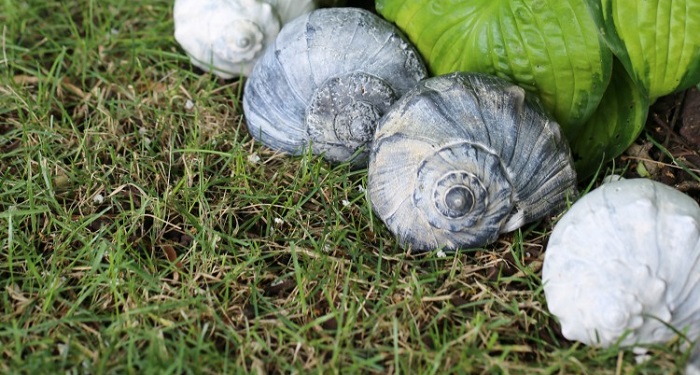
Seashell Edging Ideas
If you’re looking for a little less traditional method of flower bed edging, and a little more unique - how about using seashells to create landscape edging? Seashell edging is a great way to bring a more tropical and personalised feel to your lawn, giving you that little bit of paradise all year round.
Seashell edging is essentially the use of seashells to create separation between different features in your garden, such as your shrubs and grass. This type of edging is more for the adventurous personality type, giving your garden a little bit of that travel aesthetic.
There is no wrong way to create seashell edging, as it relies on personal preference. If you’re an avid traveller and have collected many seashells on your journeys, you may wish to use these as edging. Who wouldn’t want a constant reminder of their favourite family holidays, or travelling memories in their own backyard for reminiscing and feel-good purposes?
Cost of Seashell Edging
If you don’t already have a huge personal collection of shells waiting to be DIY’d, you can purchase seashells commercially. You can purchase these in bags, or separately depending on the size, quality and type of shell you’re looking for. Pricing varies with all of these factors in mind, for example, if you wanted to create edging using white Cockle Shells you may be looking at prices up to £4.95 per handpicked bag of around 200g.
Whereas if you would rather create an edging of colourful Pectin Scallop Shells you would more likely have to purchase them individually at an average of £0.95 each. However, pricing will depend on where you buy them from, and the quality of the shells.
There are many websites online that sell seashells in bulk, or individually such as arts and crafts stores. You could also check out your local arts and craft stores. Purchasing shells commercially will most likely give a more flawless and professional look, as they have been handpicked for quality, and some are even varnished or painted to give them a more even texture.
You will also be able to easily select the exact colours and sizes you want for your edging, rather than using a personal collection of more random sizes and colours. Keep in mind that larger shells will be easier to install, however could cost you a lot more.
Pros:
- Unique and modern look.
- Adds personality to your garden.
- Free if you collect them yourself.
- Easy to find.
- Easy to use - may not need professional help.
- Many colours and varieties to choose from.
Cons:
- Time consuming.
- Expensive if purchasing commercially.
- Need to buy a lot of them.
- Broken easily e.g. by lawnmower.
- Soil and mulch can easily cover them - especially in rainy and stormy conditions.
- Requires maintenance.
- Hard to clean.
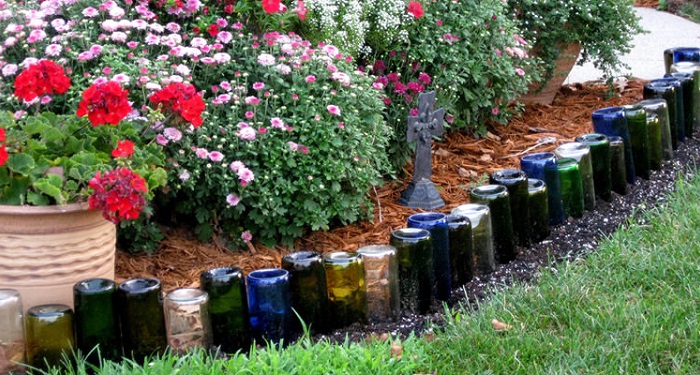
Bottle Edging Ideas
If you’re the type of person who likes to reuse and upcycle old items, then bottle edging may be the one for you. It’s more of a quirky and niche design, so it’s not to everyone's taste, however if you’re up for something a little different, give it a go!
Bottle edging is the use of glass bottles to create a border around your grass, patio or focal feature in your garden. The bottles are pushed into the soil neck downwards, and the bottoms of the bottles create the design. This is a great method of edging to use when you’re looking to use recycled materials, instead of purchasing new. If you’re a wine fanatic and have a pre-existing collection of your favourite bottles with nowhere to go, why not get creative?
The downsides of bottle edging are essentially that even though the material you’re working with isn’t dangerous in its current state, it is still glass. Glass can be easily broken and can potentially be a hazard for yourself, any visitors you have and even wildlife in your garden.
The pressure on the bottlenecks over time causes them to lose their durability, making them very prone to breakage. Therefore, while gardening you could be in for a nasty surprise finding shards of glass in the soil.
Due to them requiring a lot of upkeep, they’re not always a viable long-lasting solution for your edging needs. However, you can expect some pretty colours when the sun is shining!
The Cost of Bottle Edging
Bottle edging is the mother of cheap garden edging ideas. If you don’t have your own collection of bottles, you can collect empty bottles from bars and restaurants if they no longer need them.
Wine bottles are the best type to go with, as they are larger and therefore more sturdy than smaller bottles used for sodas and beers. They also come in a range of colours so you can get creative with your shades.
If you want to get your hands on some wine bottles more quickly, you purchase empty wine bottles online at around £5 for 6 bottles. This seems like a bargain, however depending on how many you need to fill the area, it could come up quite costly.
If you want to save some money, why not ask friends and family to save their empty wine bottles for you?
Pros:
- Quirky and unique.
- Environmentally friendly due to use of recycled material.
- Easy to install.
- Free if collecting your own bottles.
- Easy to find.
- Different colours to choose from.
- Doesn’t require professional skills.
Cons:
- Pricey if purchasing new.
- Not durable - Easily broken.
- Dangerous if broken.
- Difficult to clean.
- A lot of maintenance.
- Gaps in between bottles may not sufficiently prevent soil spillage and weed overgrowth.
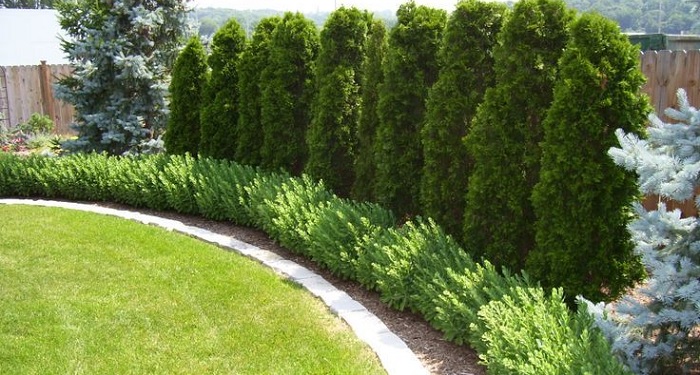
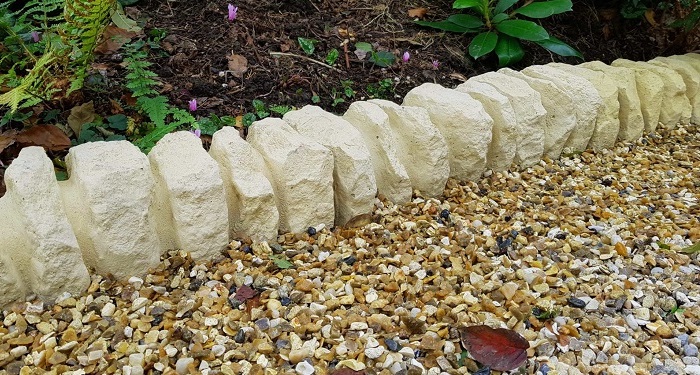
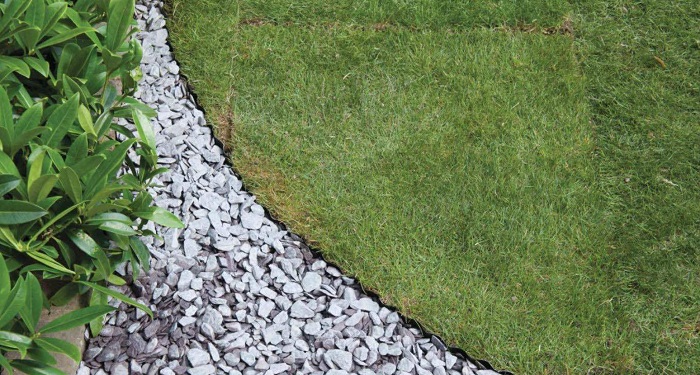
Stone Edging Ideas
Stone edging is great for those who wish to go for a more natural and outdoorsy feel in their gardens. Stone can be used to create a border around your patio, grass or shrubs, and are perfect for that more traditional feel.
There is a huge variety to choose from when it comes to using stone, in terms of shape, size and types. You can go for a more natural look, with different sized stones, or a more polish feel with carved stones.
Each type has its own unique look, and due to its versatility, the possibilities are endless. Edging stones can be strategically placed to give a more structured look or can be used more randomly to create a more naturalistic environment. Here are some types of stone you can use:
- Slate
- Cut Stone
- River Rock
- Cast Stone
- Terracotta
- Gravel
- Pebbles
- cobblestones
The Cost of Stone Edging
Stone edging costs vary greatly on what type of stone you decide to use. For example, you can purchase bags of beach pebbles for around £9 online or in DIY stores, however you need to consider that pebbles will not cover a large surface area so you may need to buy more of them.
You can purchase Slate chippings at around £7.50 for a bag of 22.5kg, however the overall cost will depend on the size of your garden, and how much you will need. Terracotta and cut stone will set you back a lot more than naturally shaped stone.
You can purchase each cut stone individually for around £4-£13 per stone, depending on the type of material, the size of the stone and how intricately the stone has been carved.
If you’re looking for a cheaper route to collect stones for your edging project, taking stones from public property such as beaches and national parks is not permitted. Therefore, you could visit some construction sites instead to see if they have any materials you could reuse.
Pros:
- Easy to install - don’t need professional skill.
- Natural and casual vibe.
- Versatile - Many different types of rock and colours to choose from.
- Low maintenance.
- Great durability - Most stone is sturdy and not easily broken.
- Heavy - stays in place.
- Keeps weeds at bay.
- Larger stones are great at protecting plants and preventing soil spillage.
Cons:
- Can be pricey.
- Stone can change pH of soil, which can harm plants.
- Stones preserve heat so plants may need watering more frequently.
- Stone such as terracotta can be fragile.
- Small stones such as pebbles are time consuming to install.
- Smaller stones can become caught in lawnmowers.
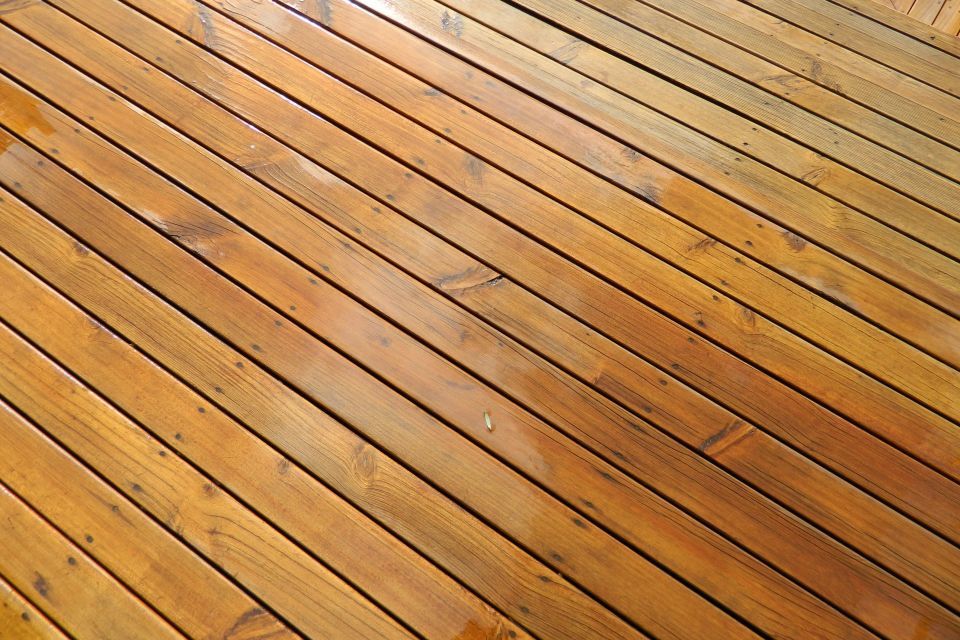
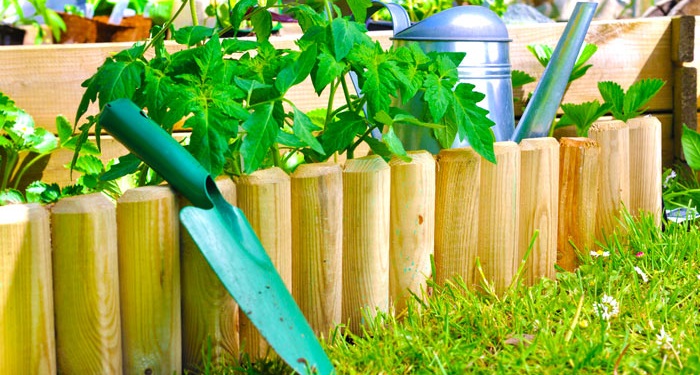
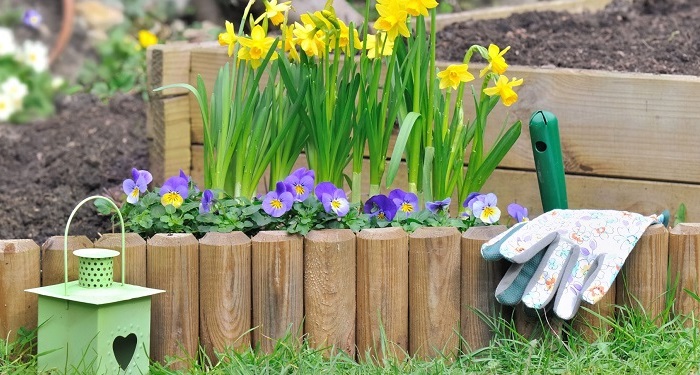
Log Edging Ideas
Log edging is another great technique to use if you’re going for that natural, outdoorsy feel in your garden. Logs can be used to create borders around your plants, to keep the soil away from the grass and protect your shrubs.
Log roll edging takes us back to the days of childhood, getting adventurous on the wooden obstacle course at your local nature reserve - and it looks fabulous when surrounded by plants and greenery.
Logs can be used for several different styles around your borders; you can stand them upright to create a mini fencing for your plants and focal points, or you can lay them down flat, and pile them up for a more rustic feel.
The best type of wood to use for wooden garden edging is either Redwood or Cedar wood, because their types do not rot. Both of these types of wood contain natural oils which repel moisture and humidity, which makes them resistant to decay and bugs.
Some types of wood cannot withstand the test of time in the elements and succumb to mould and insects. Wood can be pressure treated, to give it that little extra boost to withstand rainy weather and damp conditions. If wood has not been treated, you can purchase wood preservative and paint it onto the logs to ensure their durability.
The Cost of Log Edging
Log edging costs depend on the type of wood used, and the amount you need to create your edging. You can purchase rolls of logs which can make installing your edging a lot easier than installing them one by one.
You can find these rolls for around £6-£10 depending on the type of wood and the size of the roll. These rolls have stakes on each end which penetrate further into the ground to keep your edging sturdy.
Treated timber wood is a very popular option for landscape edging as it is a cheaper type of material to other types of wood. Cedarwood is in the middle ground with price, more expensive than other types of Timber but less expensive than Redwood. You can find log edging online and in-store at many DIY and gardening stores.
You can also use old wood and treat it yourself if you want to go for a more rustic feel, however, make sure the wood is permitted for use. Try visiting construction sites where trees have been cut down to make room for building and ask if the materials are available to reuse.
There are also online facilities which allow you to purchase reclaimed wood to recycle in your own projects, or sellers on websites such as Gumtree and Preloved selling their old, unwanted garden materials. Never use wood from national parks and reserves.
Pros:
- Rustic and natural vibes.
- Versatile - different types of wood and colours to choose from.
- Great at keeping soil off grass.
- Great at preventing damage to shrubs.
- Doesn’t require much maintenance.
- Timeless.
- Good durability.
- Potentially free if second-hand material.
Cons:
- Can be expensive depending on the type of wood.
- Can be difficult to install - may require professional skill.
- Certain woods can rot.
- Time consuming to install.
Slate Edging Ideas
Slate edging is a long lasting, yet natural solution for your garden borders. Slate edging is the use of slate tiles or slate chips as a border around your patio, shrubs, focal feature or garden pathway.
Slate is a great material to use all round. It’s extremely durable, very versatile, easy to install and easy to clean. Slate tiles can be used, either cut or natural, to create many different styles of edging for your borders.
Depending on the thickness of the slate, you can stand them up, lay them flat or stack them on top of each other. You can also purchase slate chips to create more of a gravel effect.
The dark colour of slate gives it an edge on the aesthetic meter, giving areas of your garden some darkness and adding contrast between the plants and greenery.
Slate is very often used as the main material to roof houses, making it the perfect component to withstand all the outdoor elements and stand the test of time.
The Cost of Slate Edging
You can use strips of slate to create a margin between the grass and plants in your garden, which can be purchased at around £15 each depending on the size and quality of the slab.
These can be stood up vertically as well as laid flat to make a boundary between the areas. Although an expensive option, slate requires very minimal maintenance and upkeep, saving you money in the long run.
You can also purchase slate chips for a gravel effect, you can find these in bulk bags for around £150-£200 depending on the amount, type and quality of the slate. You can also find smaller bags in a range of different sizes depending on the amount of slate chipping you need for your border.
You can purchase slate and slate chipping from most DIY and gardening stores, both online and in-store.
Pros:
- Easy to install.
- Easy to clean.
- Little to no maintenance required.
- Versatile.
- Great durability.
- Timeless.
- Clean, structured design.
Cons:
- Expensive
- Can cause injury if using natural slate - tends to be jagged.
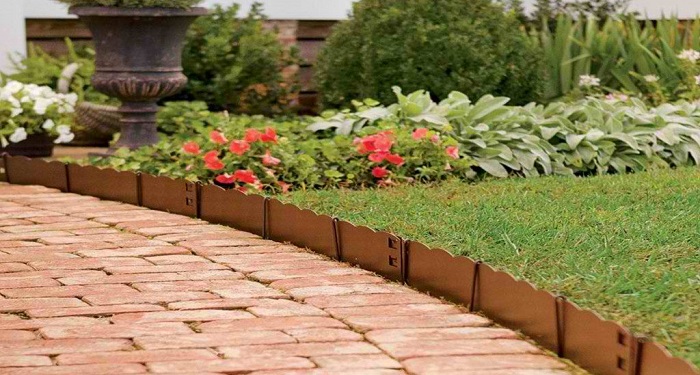
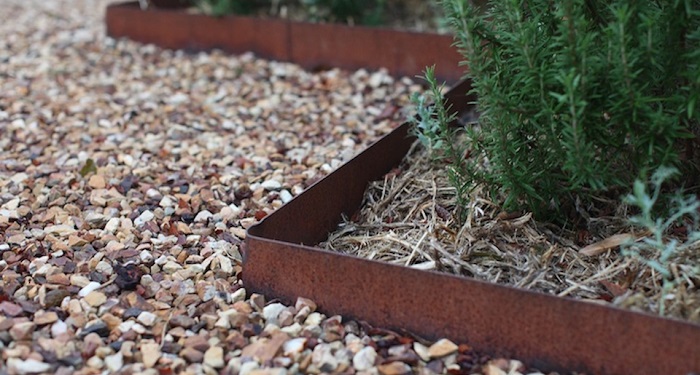
Metal Edging Ideas
Metal edging is essentially the use of metal to create a boundary between your plants and greenery, to transition your patio into the rest of the garden or to highlight focal features. Using metal as edging can create styles on very opposite ends of the spectrum, depending on the surrounding area, and the colour metal that is used.
Slate coloured steel can be used to create a clean and precise look to your garden, giving it clean cut corners and shapes. However, changing the colour to a rusty copper can really emphasise that rustic appeal you’ve been longing for in your backyard. It’s crazy how a difference in colour can give the style a complete 180-degree flip!
Metal lawn edging is durable, versatile and very flexible, allowing you to really shape your borders with ease - if you’re looking for flexible lawn edging, this is the one for you. It’s a great material for edging, with only one downside - easy toe stubbing.
Metal is thin, and a thin, raised object on the ground is always a possibility for slight injury. If you know it’s there, great - but you might want to give your visitors a little warning before they wander around your grounds.
Cost of Metal Edging
Metal garden edging is one of the cheaper options when it comes to landscaping. You can purchase packs of around 5 strips for about £80, which covers about 6m of your border. It’s extremely easy to install and the majority of the time can be done as a DIY job. The strips come with stakes which you attach to the metal and hammer into the ground to keep it sturdy.
You can purchase metal edging from most DIY and gardening stores, both online and in-store.
Pros:
- Extremely durable.
- Easy to install.
- Cheap.
- Weather resistant.
- Flexible
- Versatile.
- Clean and precise.
- Keeps weeds at bay.
- Prevents soil overspill.
- Prevents damage to plants.
- No maintenance required.
Cons:
- Potential for injury.
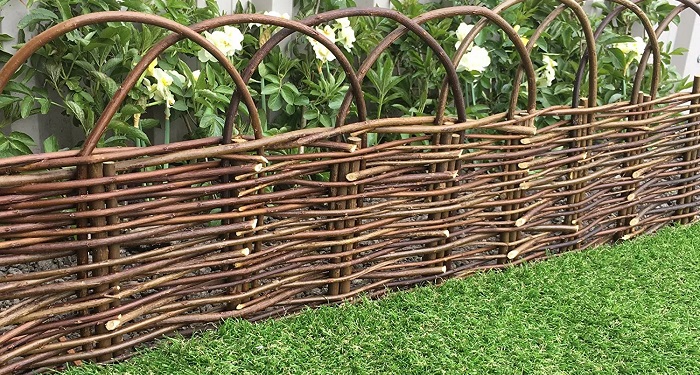
Woven Edging Ideas
Woven edging has been around for centuries. If you are going for that rustic cottage garden look, this type of edging is a must! It reminds us of a cute little hand-woven basket of goodies, and it sure holds a lot of charm!
Otherwise known as ‘Woven Wattle Fencing’, woven edging is a method of weaving thin branches together to create a basket-like design. The most common types of wood used in woven edging are willow or hazel wood, as they are extremely flexible and have a great durability about them.
Woven edging is amazing for anyone who is conscious about the environment, as it is very earth-friendly, and takes us back to our natural roots.
The branches are woven onto wooden stakes, which can be as high as you want them to be. You can create a cute little border for your plants or build it up into more of a fencing style.
It’s fabulous for making little pathways through your garden, with minimal effort, and no need for digging. The best part is, you can do it yourself! All you need is some willow, a little patience, and an internet tutorial.
Cost of Woven Edging
You can purchase pre-made woven edging online and in DIY and gardening stores, by the metre. Two metres of woven edging should set you back at around £13 each. You can purchase packs of 1m, 2m, 10m, 20m, 40m and 100m.
If you’re looking to DIY your own woven edging, you can purchase bundles of willow cuttings for around £24-£30 each, depending on the type of willow you wish to use. Different types of willow branches come in different colours, so the type you purchase will depend on the style you are looking for in your garden.
Pros:
- Rustic and traditional feel.
- Relatively cheap.
- Flexible.
- Easy to install.
- Can DIY
- Keeps weeds at bay.
- Prevents soil overspill.
- Prevents damage to plants.
Cons:
- May require more maintenance than other types of edging.
- Difficult to clean.
- Not as durable as other types of edging.
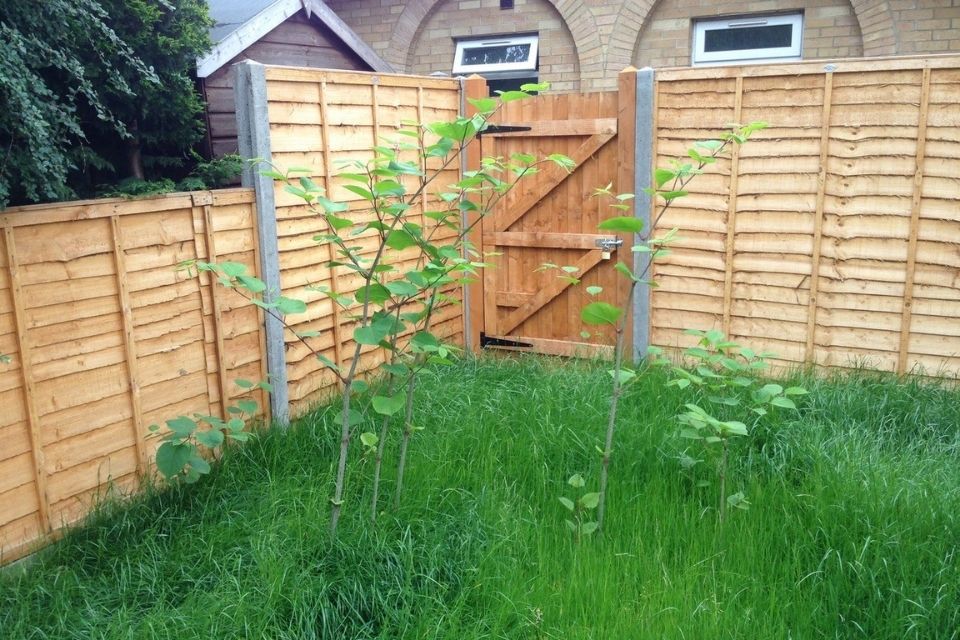
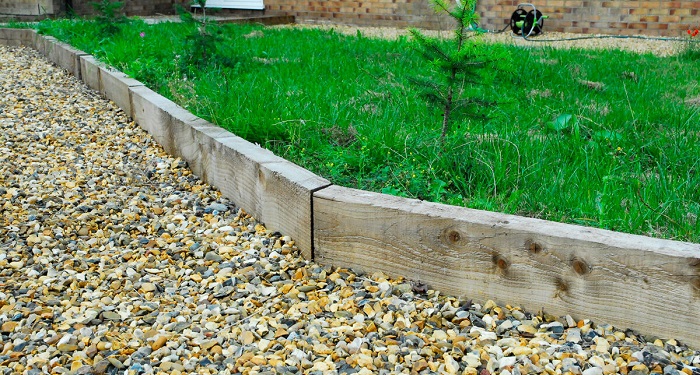
Railway Sleeper Edging Ideas
Railway Sleeper edging is the use of railway sleepers to create a partition between your border and the rest of your garden. A railway sleeper is the name for the wooden rectangular planks that lay horizontally underneath the railway tracks.
The purpose of a railway sleeper is to hold the railway tracks in a sturdy position and ensure that they maintain the correct width parallel to each other.
Railway sleepers come in a range of different materials, such as wood, concrete and steel, however the most common material to use for landscape edging is wooden sleepers. This is due to them being a lot more common and easier to find than other materials, and a lot cheaper to purchase.
Wooden sleepers are also quicker and easier to install due to their weight compared to steel and concrete, which makes it easier for you to DIY and the need for professional help is less necessary.
You can place railway sleepers around your shrubs to create an angular style, in a soft natural way due to the colour of the wood fitting in well with the surroundings. You can also stack the sleepers on top of each other to make your edging higher.
Cost of Railway Sleeper Edging
You can purchase new or reclaimed wooden sleepers at many timber warehouses and DIY stores both online and in-store. Newer sleepers are usually made from softwoods such as pine or spruce which are relatively cheaper than oak sleepers. However oak sleepers are of a higher quality, are easier to treat and will save you money in the long run due them not needing as much maintenance.
You can purchase new wooden sleepers from between £10-£30 depending on the size and type of wood used. Pine and spruce are on the lower end of the price spectrum, and oak is on the higher end.
If you’re looking to add a bit of character and history to your garden, you can also purchase old reclaimed railway sleepers. Old wooden sleepers are relatively cheaper than new ones, you can find reclaimed old oak sleepers for around £13 each.
Pros:
- Great for a natural look.
- Can be easy to install but may need professional skill.
- Can be cheap depending on type of wood - even cheaper if second hand.
- Keeps weeds at bay.
- Prevents soil overspill.
- Prevents damage to plants.
- Durable.
- Don’t require much maintenance.
Cons:
- Not flexible.
- Must fit using proper methods or water can pool at the base causing rot - lay down a waterproof plastic membrane before installing.
- Need to be treated to prevent rot
Sources
- https://www.bhg.com/gardening/landscaping-projects/landscape-basics/using-landscape-edging/
- http://sacredhabitats.com/2012/06/12/wine-bottle-garden-beds/
- https://www.diy.com/departments/outdoor-and-garden/stone-gravel-and-chippings/slate/_/N-e6kZ1z13e32
- https://www.dummies.com/home-garden/lawn-care/how-to-install-lawn-edgings/
- https://www.ardosiaslate.co.uk/slate-for-your-garden
- https://www.brazilistone.co.uk/projects-item/brazilian-black-slate-strips/
- https://www.homebase.co.uk/swift-edge-garden-edging-6m-natural_p457466
- https://www.primrose.co.uk/papillon-lawn-edging-c-66_12955_11931.html
- https://www.willowgrowers.co.uk/cat/9/willow
- https://www.railwaysleepers.com/railway-sleepers/railway-sleeper-info
- https://www.lawsons.co.uk/blog/landscaping/should-i-buy-new-or-used-railway-sleepers
- https://www.wickes.co.uk/Products/Gardens/Garden-Decor/Garden-Sleepers+Raised-Bed-Kits/c/1000733
- https://www.uk-timber.co.uk/reclaimed-creosoted-railway-sleepers/4-reclaimed-oak-railway-sleeper.html